Those kitchen floors were no bueno.
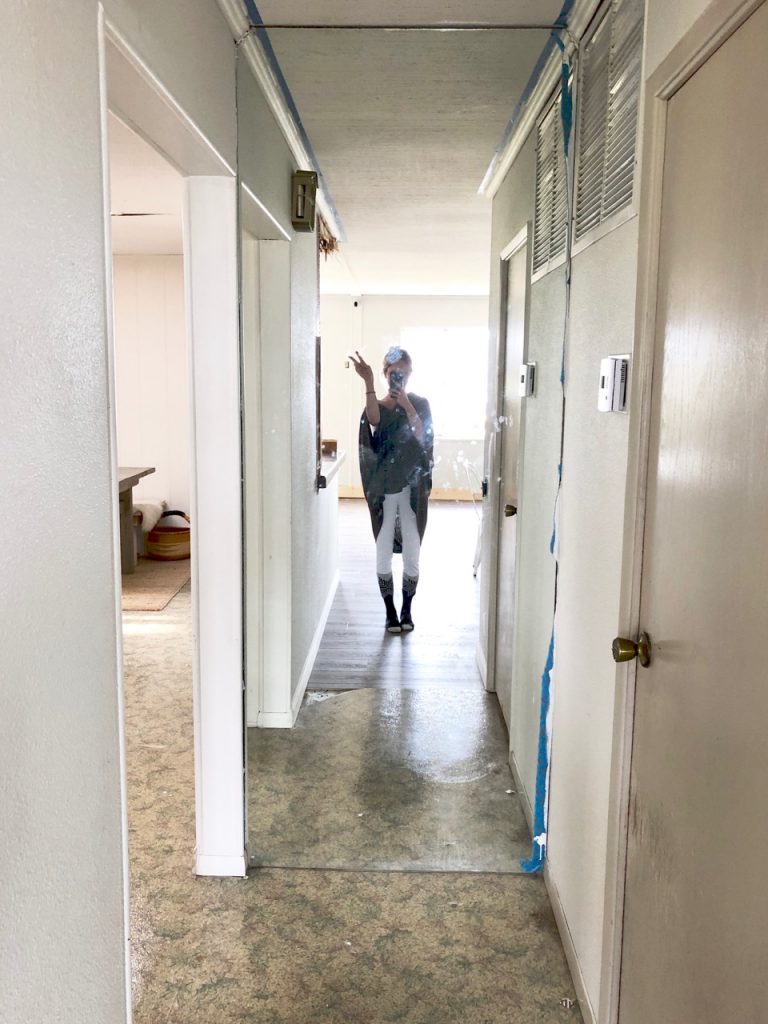
When I first moved into this place, I resolved to keep all my MUST! RENOVATE! HOUSE! tendencies in check. It’s a rental, and it’s one that’s going to be torn down whenever I vacate it (which will obviously be…ahhhh…later than expected, as my down payment money has been evaporating by the day, WHEEEEE). But I am still a firm believer in fixing the things you cannot abide, even in a rental – because you live there. And one thing that I knew I’d have to fix here was the truly abominable linoleum floor: It was chipped, and stained, and made the whole kitchen/dining area – otherwise the loveliest part of the house – feel dark.
I thought about epoxy. I thought about layered rugs. And finally I decided to go with peel-and-stick tile, wherein you literally just peel off the backing, and stick it on. My rationale for peel-and-stick tile:
- Relatively inexpensive (tiles range in prices, but I did the entire floor – and it’s a big area – for about $300);
- Relatively easy to install (albeit time-consuming – more on that later;
- Tons of style and color options. So many, in fact, that I had trouble deciding on the pattern, so I left that one to the doyenne of good taste, Audrey Scheck (she selected this style).
Want to see how it went?? Let’s start in that kitchen.
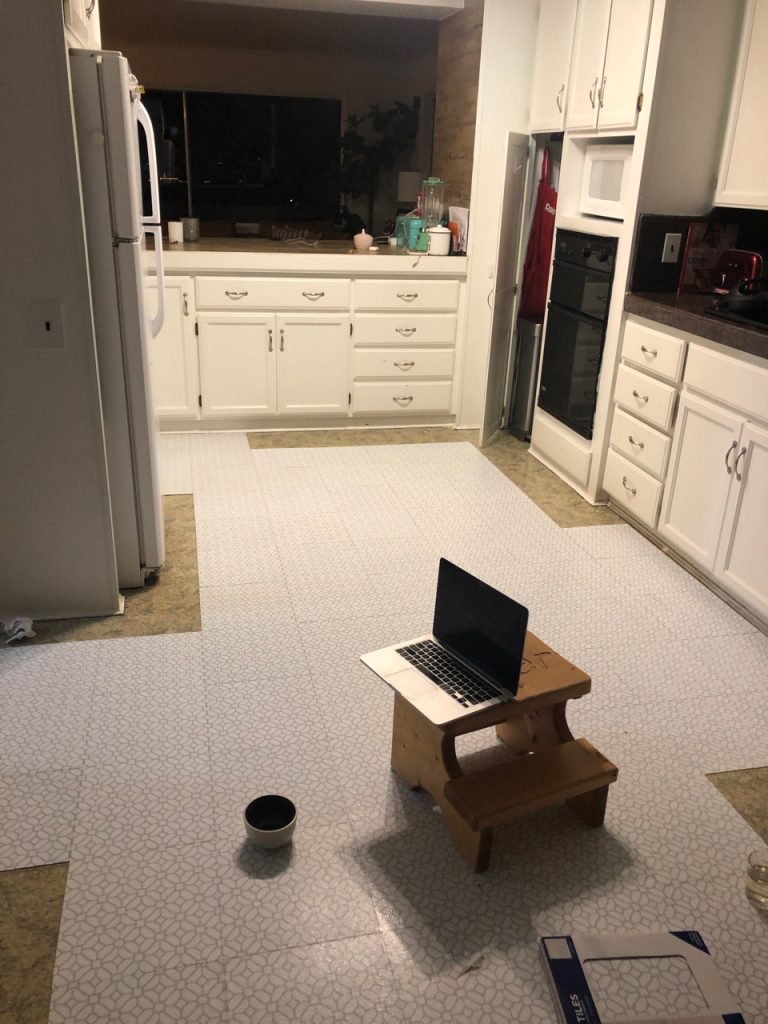
Alright, so the first con is that it took a realllllly long time – I had to break up the work over several evenings. It doesn’t seem like the process would be that time-consuming, but you have to line up the edges so that the pattern matches – and when it comes to the edges, there is a LOT of measuring and cutting with Xacto knives (I went through five or six blades by the end).
As you can see, I straight gave up in some places (this was a sort of hole in the floor that I filled with drywall patch and then just…abandoned. Meh.
Here’s the end result in the kitchen. You can see that there’s some lifting in certain spots (I’ll explain how to fix that in a moment), and that there’s a little odd darkening along some of the seams. Overall, the effect is much lighter and brighter, and definitely preferable to the original linoleum, but my feeling is that this was simply wayyyy too big of an area to use peel-and-stick tile in. I’m happy with the look, but if this was a house that I owned, I would definitely go for a higher-quality flooring option.
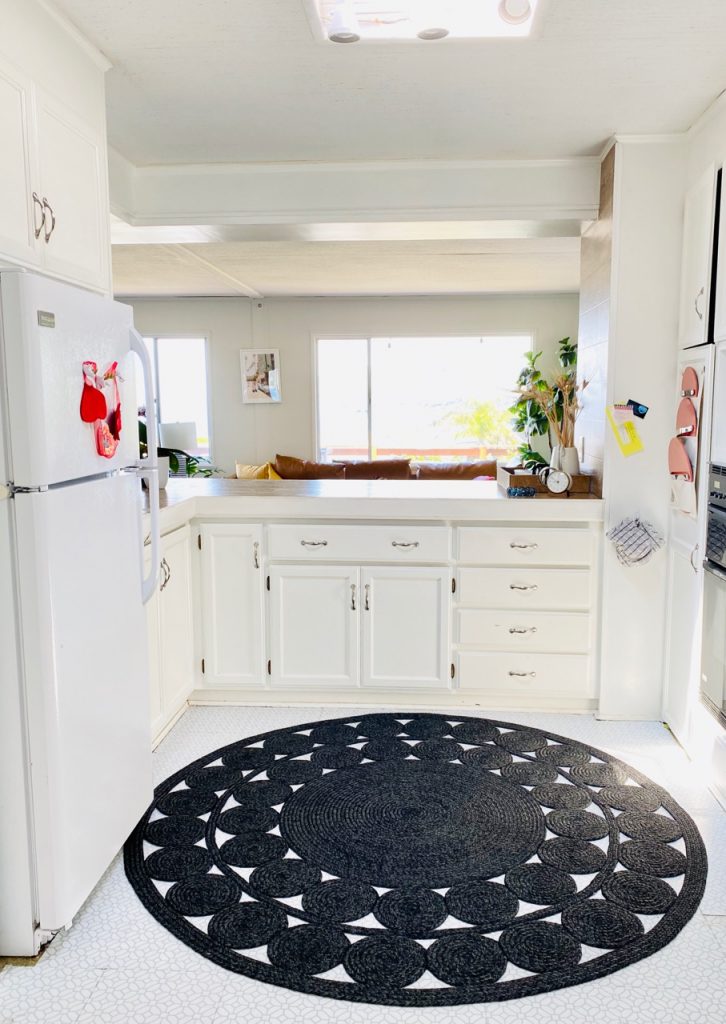
I added a rug to break up the look (this one, if you’re curious – and it’s on sale), and I think it’s significantly better with some layering.
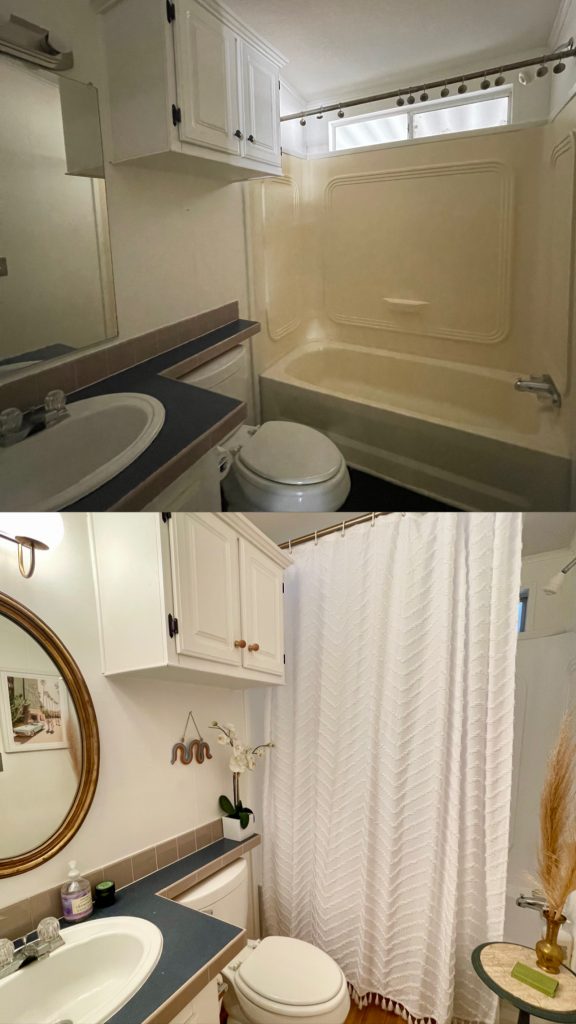
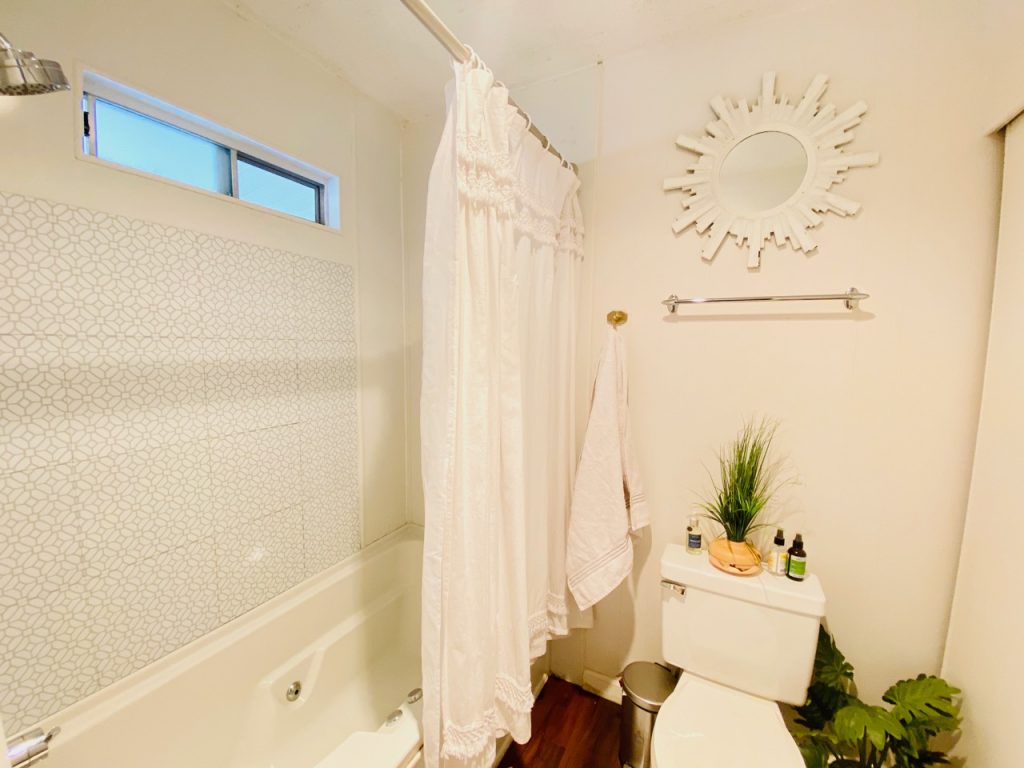
Now let’s look at a space where I think the experiment was more successful: The master bath.

Here’s the situation we were dealing with. It looks to me like the previous tenant installed a new bathtub (removing the glass inserts, which is what made those curving lines along the edges of the tub), along with inexpensive walls that weren’t the right kind of material for a high-moisture area…hence the creepy peeling spots.
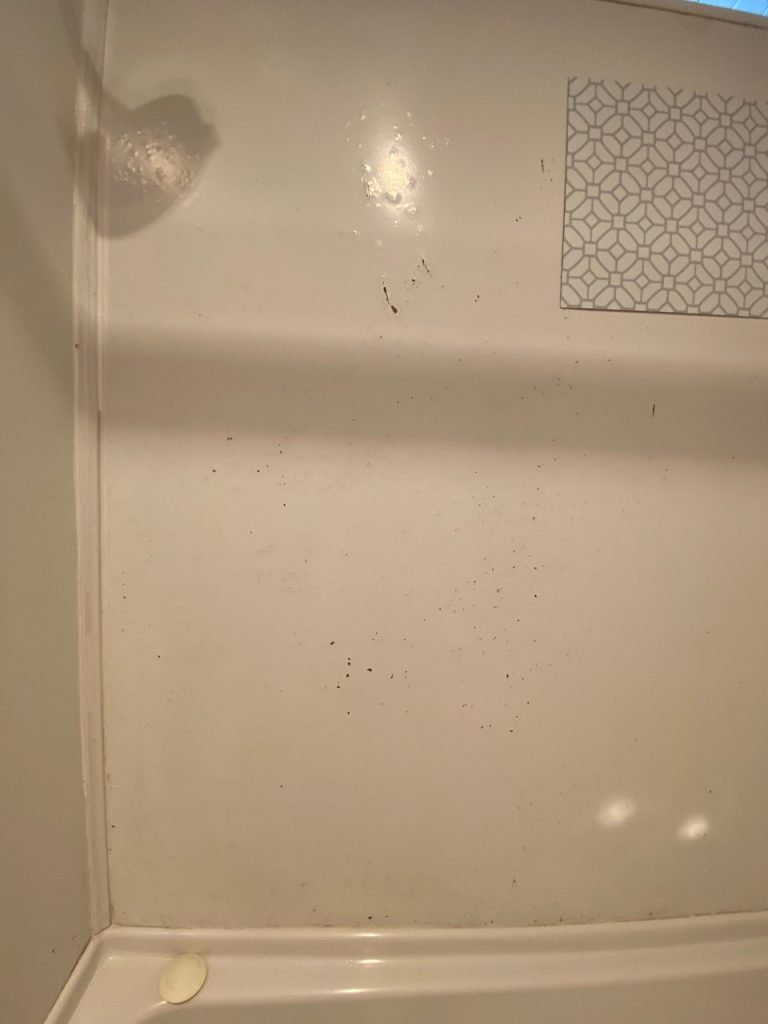
Eeeeek.
Short story: You know I love me some baths…and this was not a bath I wanted to bathe in.
The primary issue was that one wall – I can deal with the rest of it – so I used the tiles I had left over from the kitchen floor redo. This did not work.
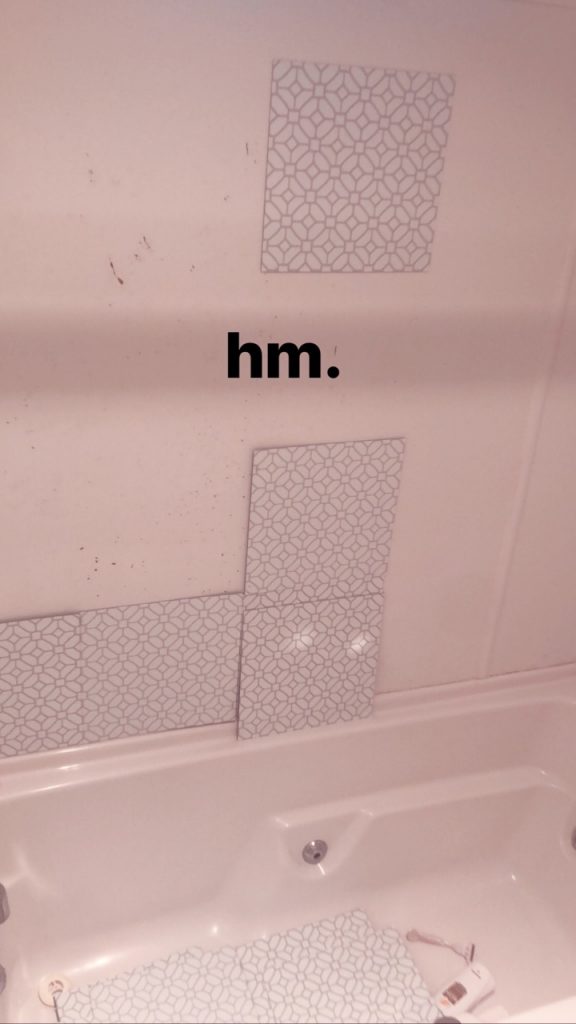
I stuck them on around 8PM one night, and woke up at 2AM to an extremely loud crashing sound (fun!). Basically, the peel-and-stick situation may be strong enough to adhere to a floor, but a wall – and especially a wall that’s not perfectly flat and even, like mine – just isn’t going to hold them.
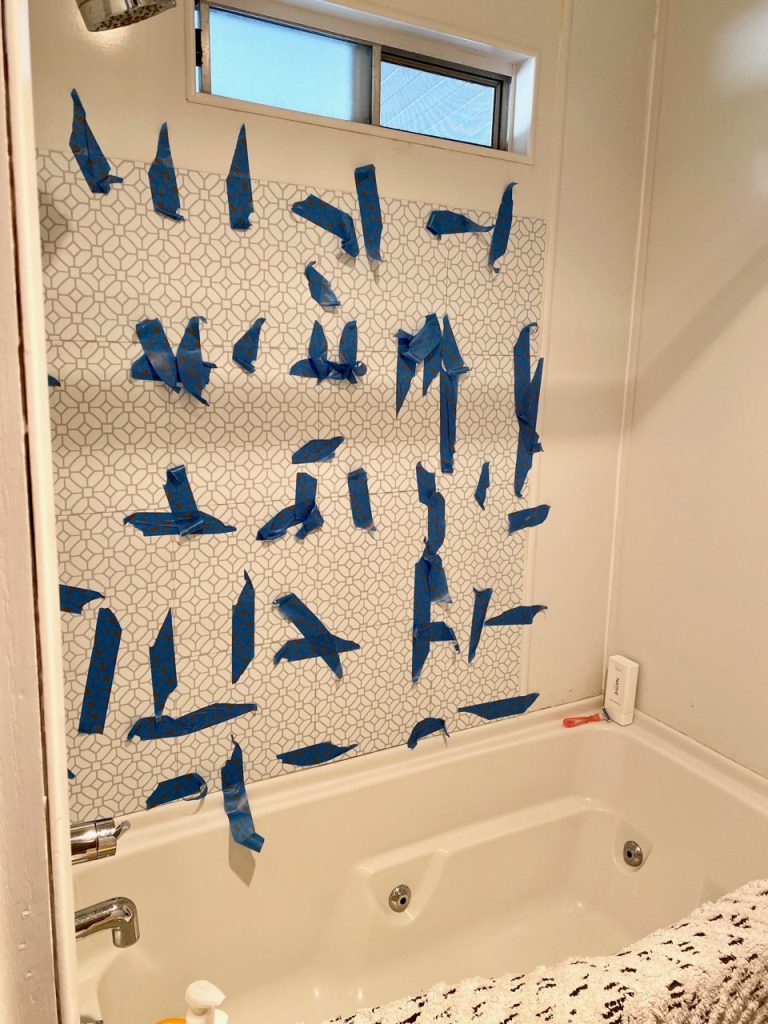
Solution (and this works for the lifting tiles in the kitchen, as well): I bought Loctite Mirror, Marble & Granite Construction Adhesive – basically a super strong glue that’s excellent for use in bathrooms – and used blue tape to secure the tile, then left it to set overnight.
And ta daaaa!
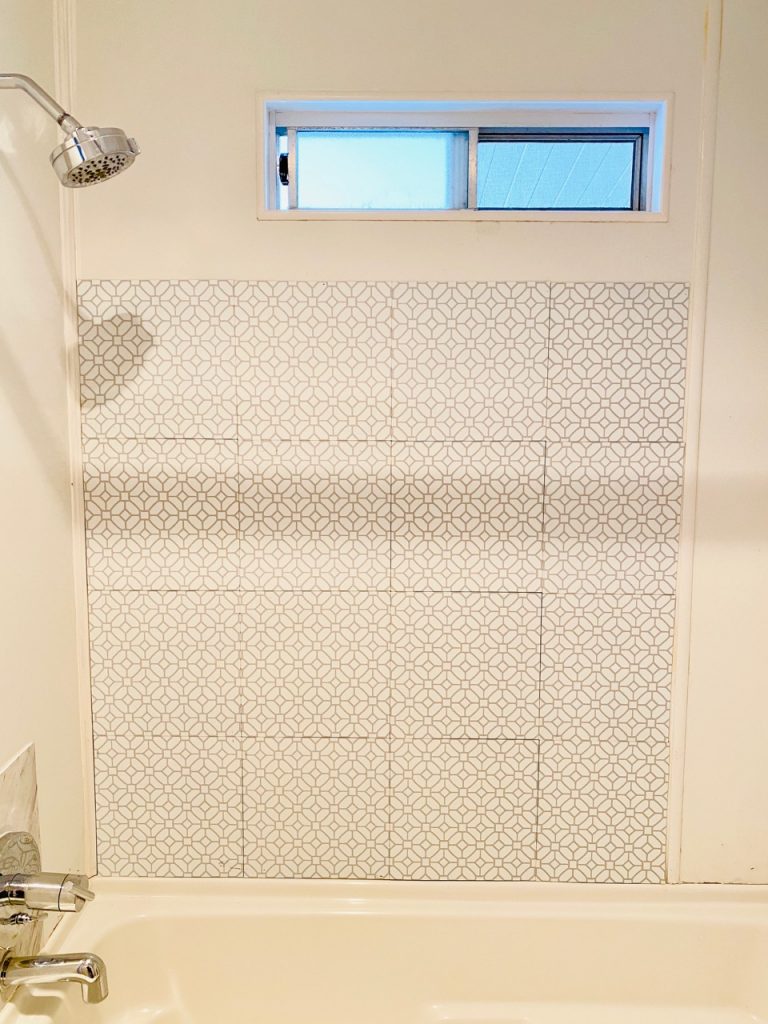
You can see the lines in between the tiles, but such is life. I think it’s SO much better, and will be continuing the tiles around the rest of the tub for a future project.
Thoughts? Questions? Hate/love/meh?