Awhile back, I had a terrible haircut. Like, a terrible one. An unacceptable one. The kind of haircut that makes you feel sad, because there is literally nothing you can do with it that isn’t terrible and unacceptable.
Around that time, Francesca, Brie and I went to Desert Hot Springs for a girls’ weekend. While we were there I whined a whole lot about my terrible haircut, and so Francesca took pity on me and taught me a trick.
This trick is gold, and – with Francesca’s blessing (and all due credit) – I am going to share it with you now. It works on short little bobs like mine, and massive thick manes like Francesca’s, and in virtually every situation what it does it transform a bad hair day into an adorably laissez-faire updo (with a chic teased-up crown!) in about 30 seconds. I’ve been wearing my hair like this off and on for two years now; it’s my go-to whenever I feel like I can no longer handle how bad whatever’s happening on top of my head looks.
Then, last weekend, I decided to wear my hair like this on my birthday so I could feel cute without dealing with it. I posted a photo of the updo on Instagram, and asked whether you guys wanted a tutorial…and the answer was a resounding yes.
So?
Check out the video above to see how you can twist up your short/long/thin/thick/whatever hair into a deconstructed French twist that’ll make your life easier all summer long. Next time it is humid out, please feel free to comment with the words “thank you Jordan/Francesca-where-credit-is-due.”
HOW-TO: EASY, MESSY UPDO FOR EVEN THE SHORTEST HAIR
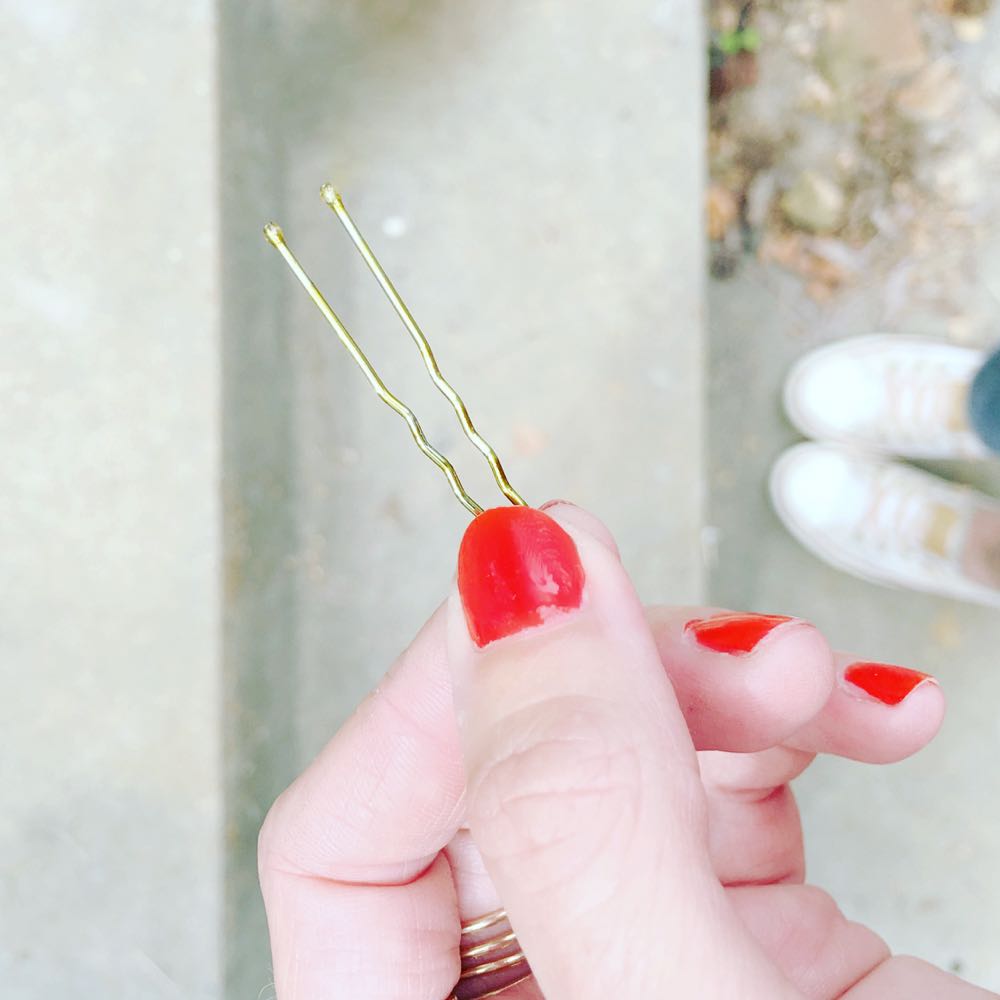
1. First, you need to have U-shaped bobby pins, like those up there. They are the best for securing a style while remaining hidden in the depths of your locks, and I never knew how phenomenally useful they were until I started using them. Now I literally do not go anywhere without a few tucked into a pocket or handbag.
2. Pull the top 1/3 of your hair into a topknot. Don’t worry about how it looks; the point is just to get that bit out of the way.
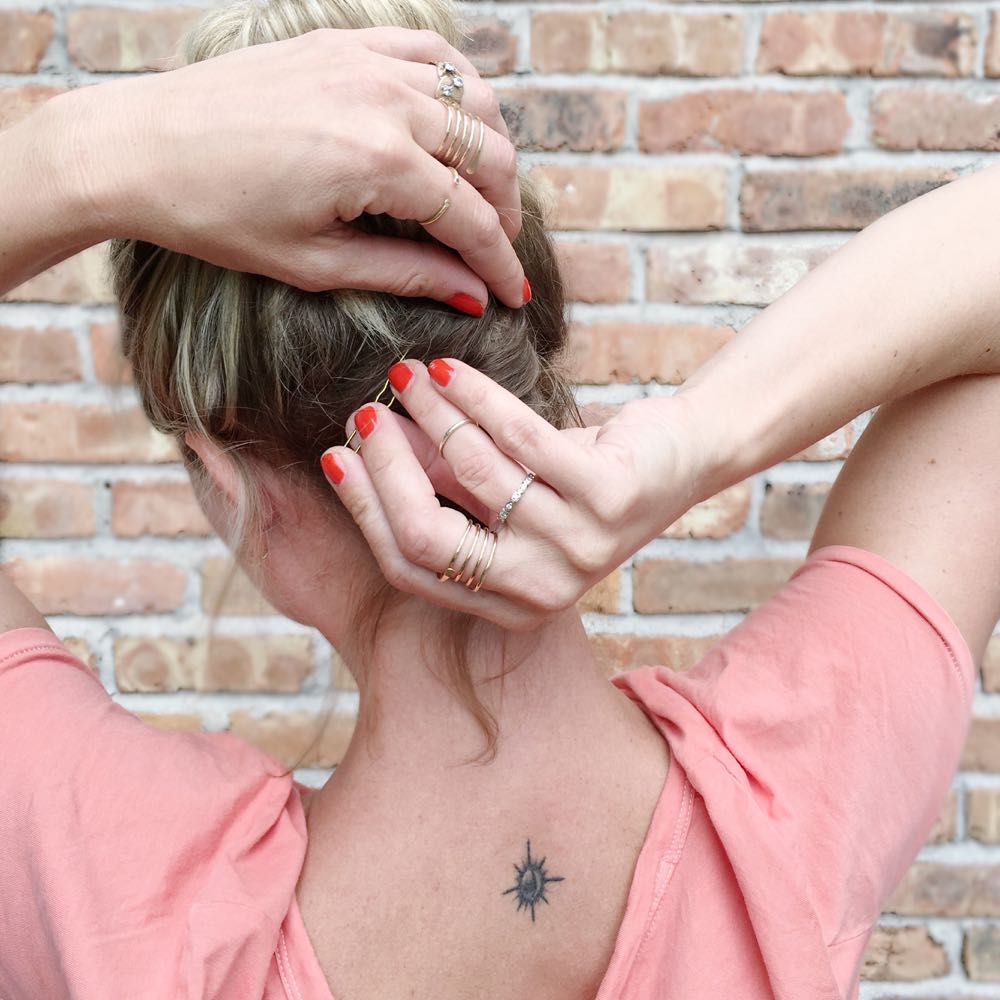
3. Starting from the nape of your neck, wrap your hair inwards from left to right toward the center. The goal is to form a twist going up the back of your head. Like a French Twist, except you don’t need to worry about it looking fancy.
4. To secure your un-fancy French-ish twist, start with the open end of the pin facing to your right. Use the pin to grab some hair from the left side of the twist and pull it gently over to the right side…
5. And then turn the bobby pin so the open end is facing to your left. Push it into the center of the twist to hold.
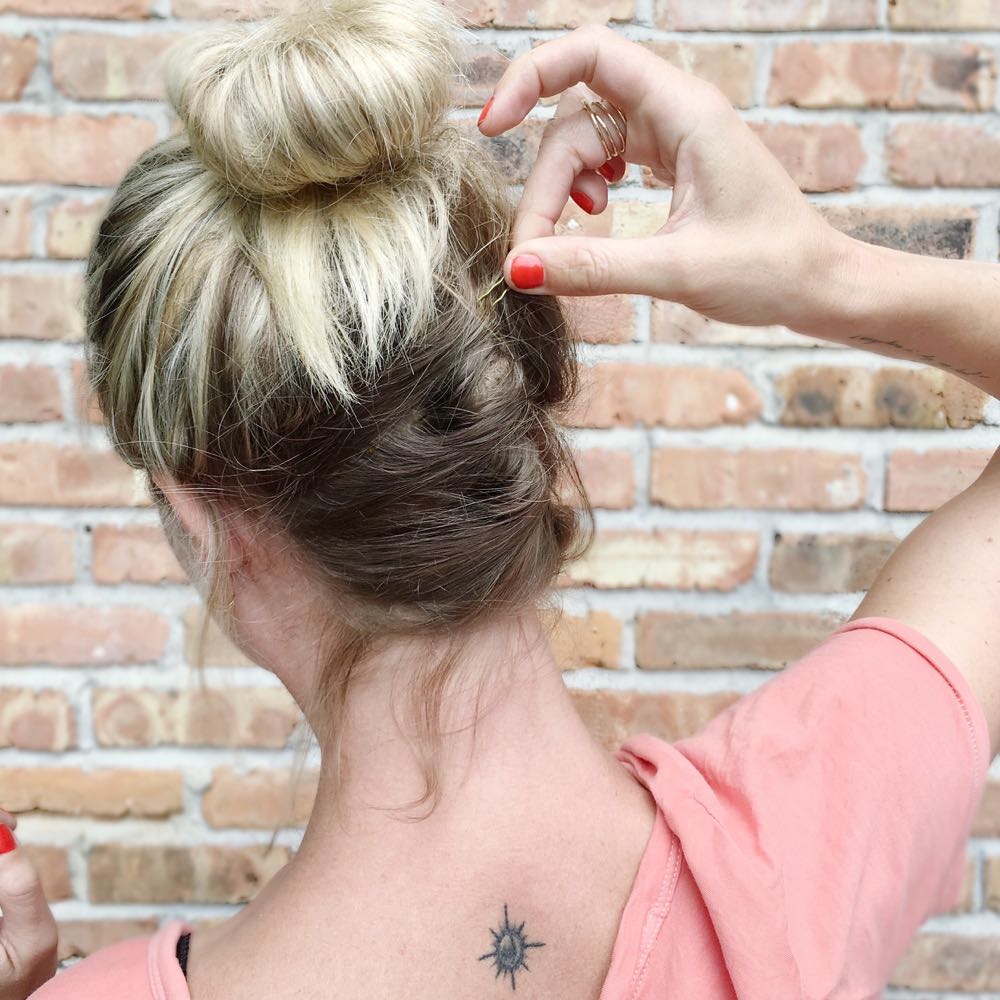
6. Continue pinning until all the hair underneath the bun is secured.
7. Take out the top bit of hair that you pulled into a bun, twist it into a topknot, and then use the same pinning technique that you did on the back of your head to secure the bun. If pieces fall out, great. If you want it to look neater, add more pins. You simply cannot mess this up.
et voilà
Now, granted: You’ll have a bit of a job on your hands when you get home and have to go hunting through your head for wayward and potentially very sharp hair accessories, but in the meantime you’ll also have a style that stays put exactly where you want it to be for as long as you need it to – and looks cute and tousle-y and relaxed in the process.
Click here for more fun (and easy, obviously) beauty tutorials, including makeup for new mamas, a navy and gold eye, and my “baby feet” experiment (omg).


