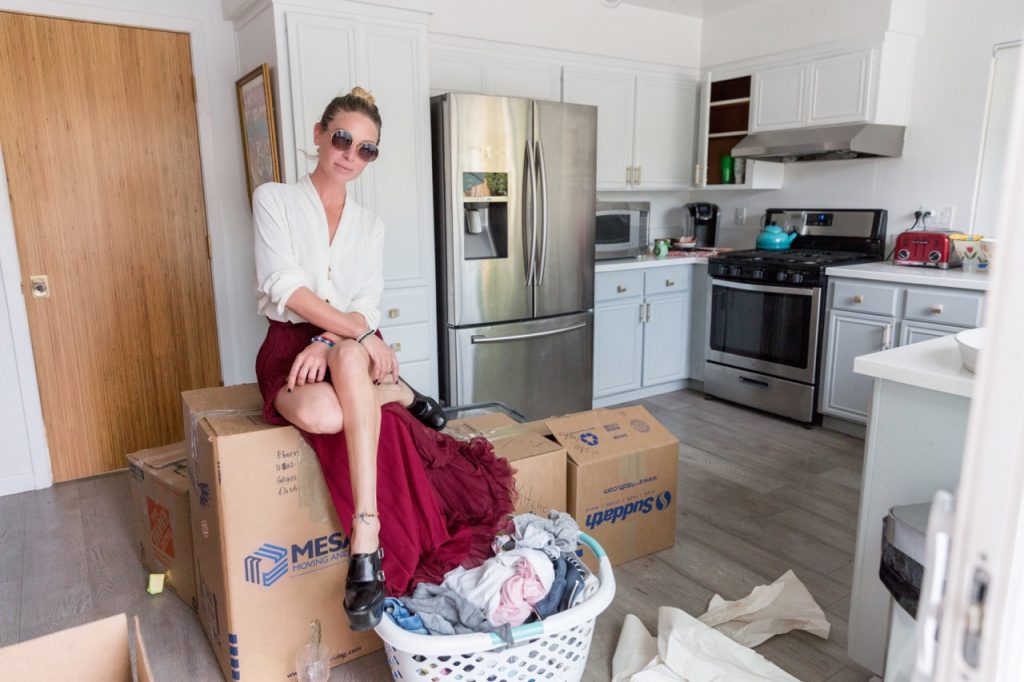
I’ve gotten pretty handy over the years, mostly thanks to the presence in my life of a few Superwomen who have taught me how to do things like lay tile, resurface brick, and even demolish concrete (not the best idea for the old neck muscles, but surprisingly fun). And lord, do I wish those women lived near me still, because the house that I’m currently renting has alllllllll the project opportunities (yes, I fix up houses that I rent – you can read my rationale here).
In the course of my efforts to fix up certain elements of this house that I wasn’t into, I’ve had some wins – painting my daughter’s room, securing some maybe-going-to-fall-down ceiling panels, retiling my entryway step, suffocating weeds and replacing them with lavender and blueberry bushes, that sort of thing. But I’ve also had oh my god, some misses – like, for example, the linoleum kitchen floor that I covered (poorly) in stick-on tile that is MUCH better-suited to small spaces and apparently turns grey with any wear whatsoever.
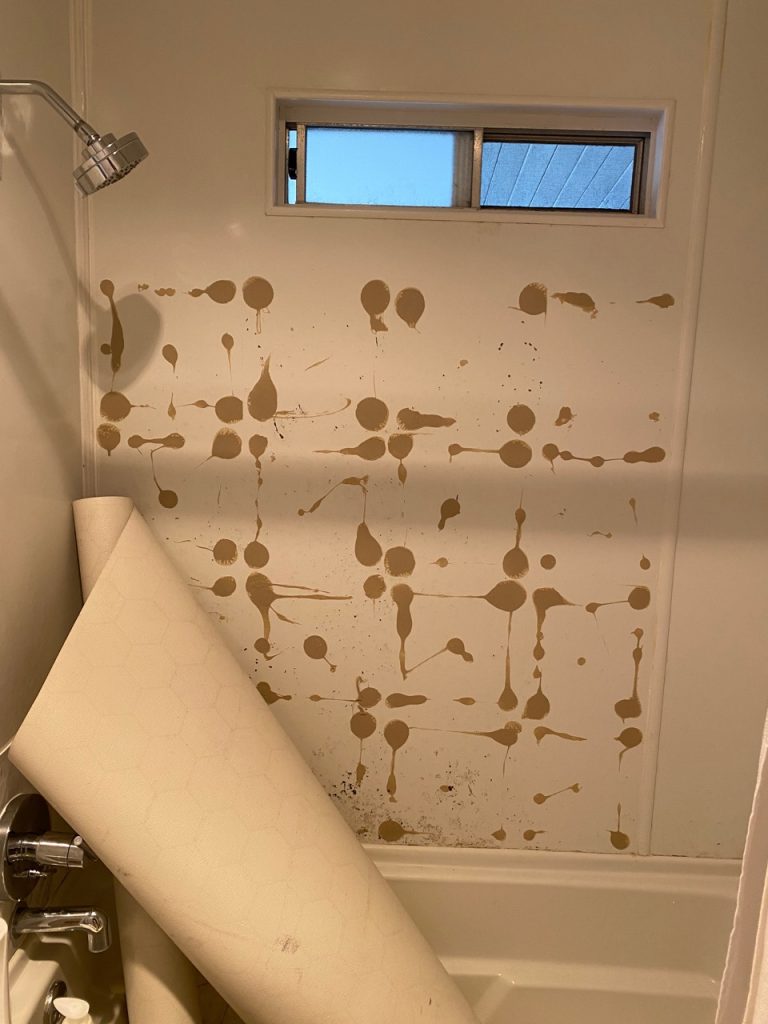
Another fail: I used that same tile to cover a gross wall in the bathroom. I discovered that its stick-on powers did not extend to use on bathroom walls (or at least not somewhat uneven ones) around 2AM later that night, when I was awoken by the huge “bang” made by twenty tiles all falling off the wall and into my bathtub simultaneously. But was I to be deterred?!
I WAS NOT.
Related: A Bathroom Tile Makeover…With Paint
The very next day, I was back at it with the tiles, this time securing them with professional-grade silicon glue that I’d picked up at the hardware store and that I’d been assured would hold on a twenty-pound mirror – so certainly a five-ounce tile! Right?
Wrong.
Lord save us.
…Time to call a professional.
Here’s what the handyman I called and I considered:
- Epoxy paint. We decided against this because the particleboard (why) surface was so uneven that it would still have looked messy.
- Replacing the stick-on tiles using a different type of adhesive and waterproof sealant. Except I’d already thrown them out. And they’re kinda expensive. Woops.
- Replacing the surround. You can’t realllllly do this piecemeal – surrounds are generally one large piece, and are customized to the tub below it. This would have been far too expensive, in any case.
- Purchasing a waterproof wall board, cutting it to size, and securing it with adhesive and waterproof sealant.
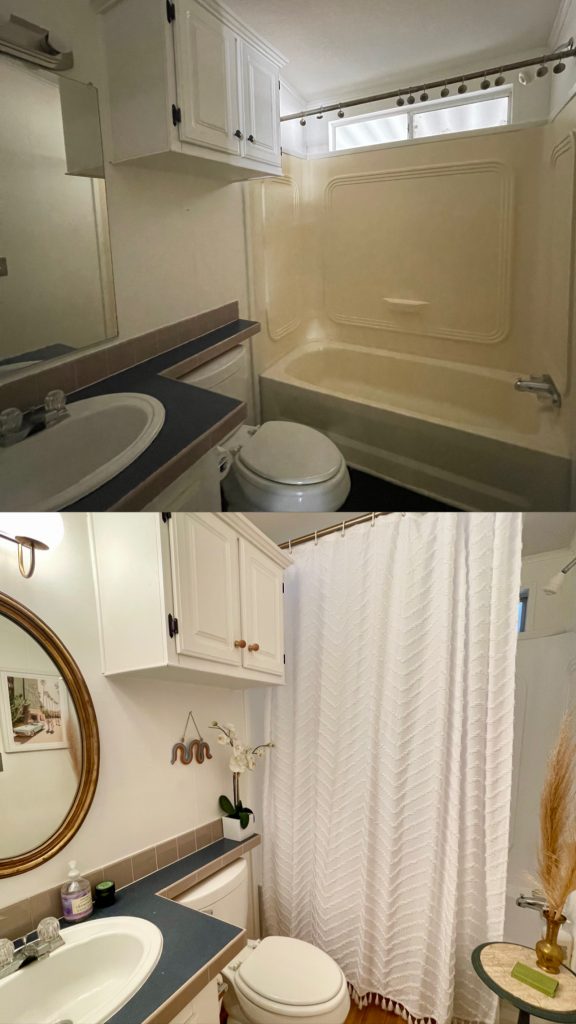
The last option is what we ultimately went with, because it was affordable ($60 for the wall board plus about $75 in labor). We (by which I mean “he” – I stayed out of the way for this one) didn’t go all the way up the wall because it would have required purchasing another board, and would have significantly upped the labor (cutting out the window, etc) – and really, all I wanted in this case was to not feel icked out by the wall; it didn’t have to be stunning and perfect.
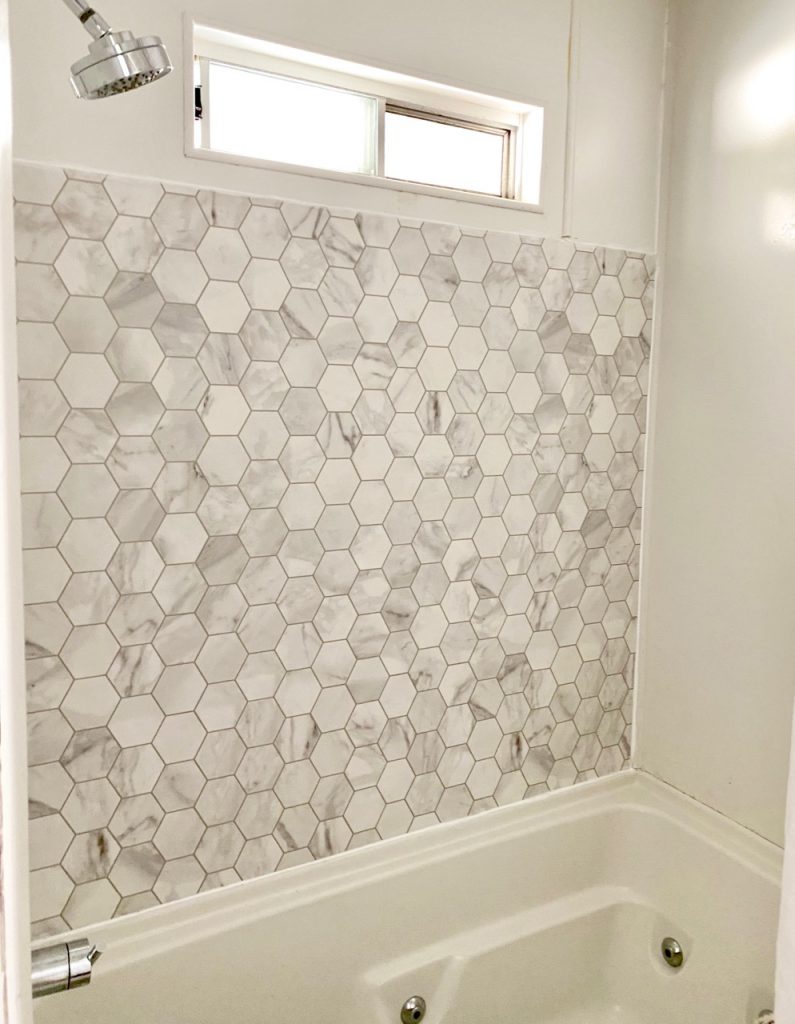
But I actually really like how it turned out! The wall board is much nicer than I expected – and ended up looking like an actual design choice rather than a quick fix.
Could I technically have done this myself? I suppose so, but what I’m discovering as my DIY-experimenting goes on is that there are some areas where a mistake is no big deal, and some – like in bathrooms, where there’s lots of water and humidity – can cause significant and expensive damage.
Limit = discovered, and it is Bathroom.