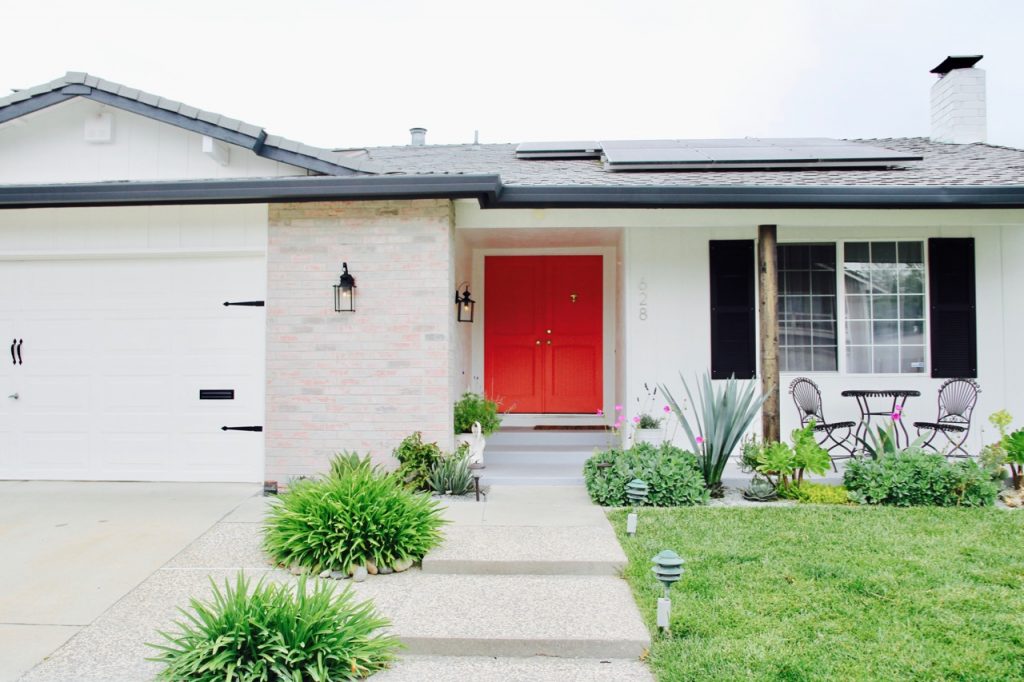
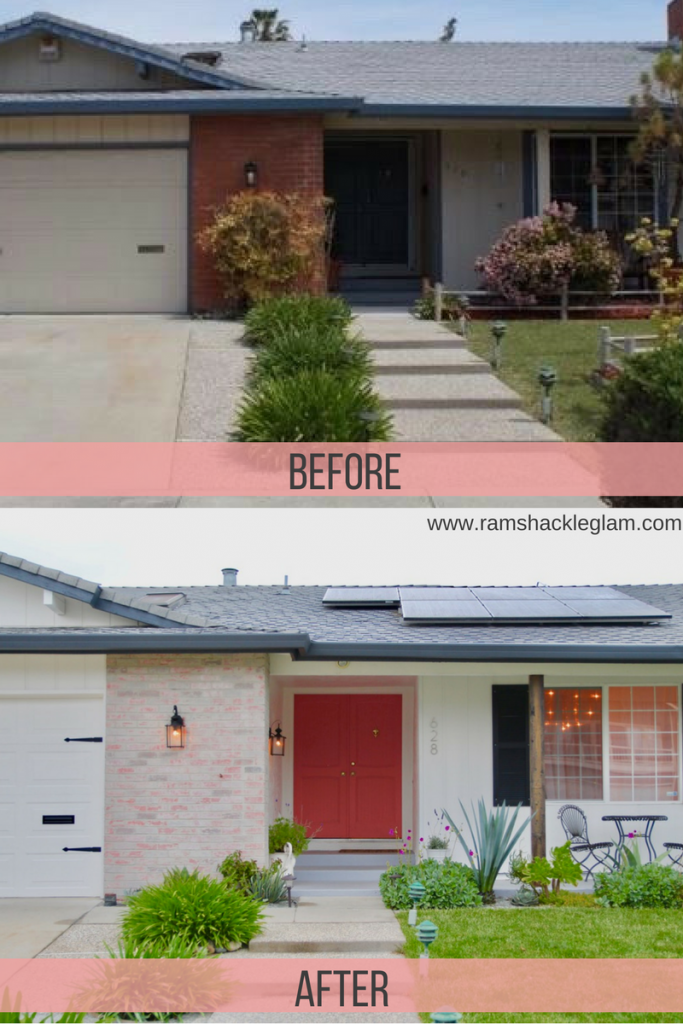
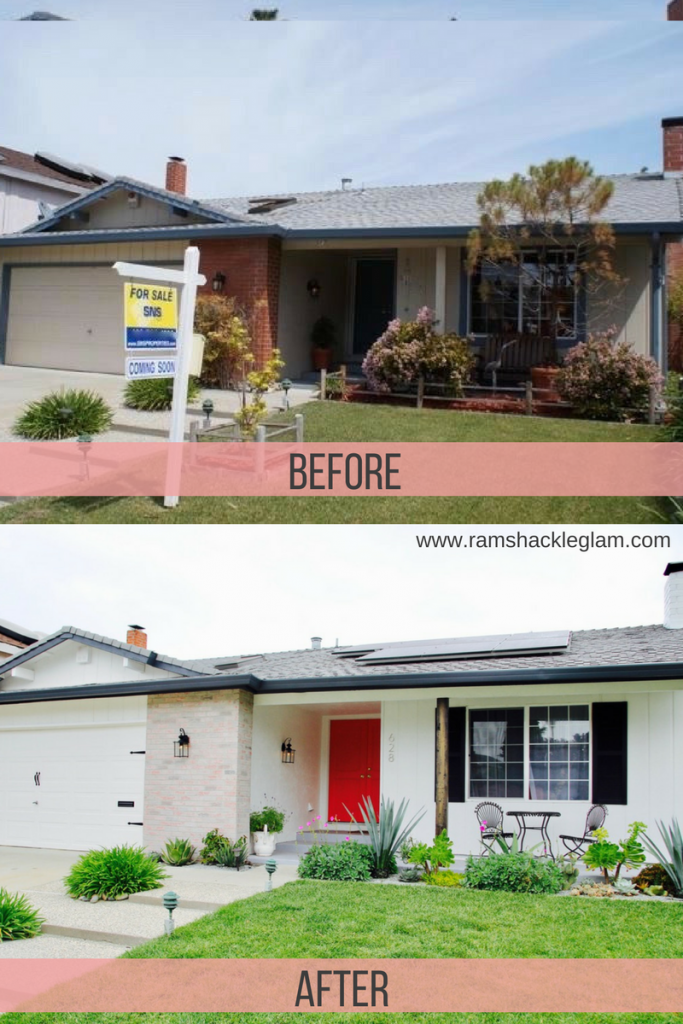
When we first moved into our house, I did a lot of work on the inside – adding entryway tile, turning a tiny bedroom into an office/playroom, adding lighting, et cetera – but aside from doing some (necessary, thanks to the drought) xeriscaping, I pretty much gave up on the house exterior. It was tan and dusty blue – with an orange-brick “accent wall” – and sure, I figured, I could paint it…but it’d still look like what it was: a more or less personality-free ranch house built in 1969. It’s not the kind of house that screams, “Emphasize my architectural details and singular flair!” Because on this house, details and flair are nowhere to be found.
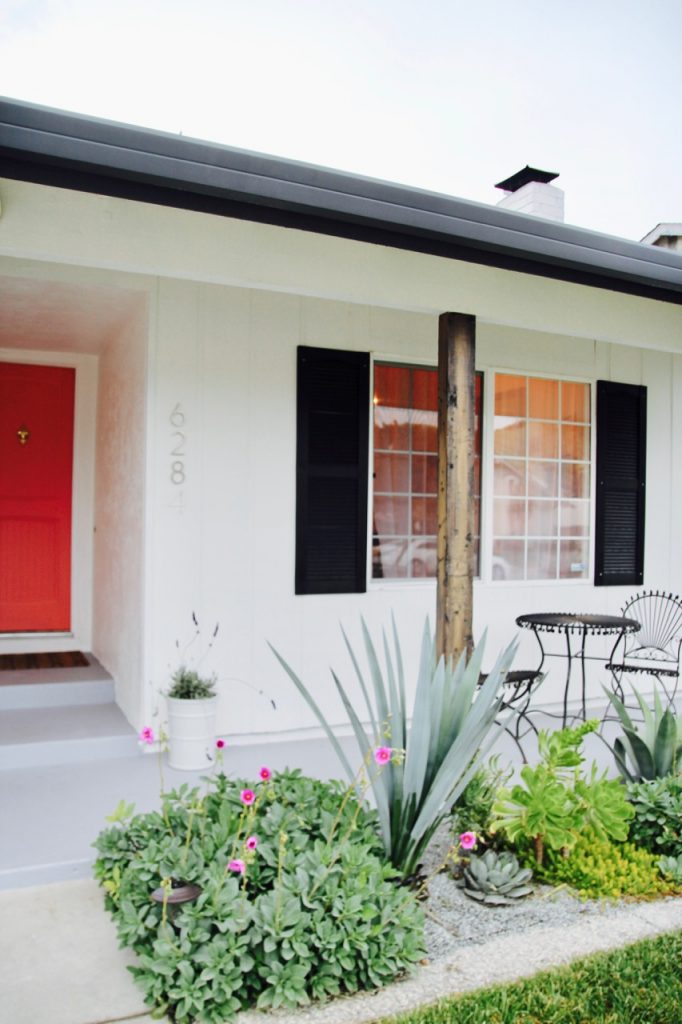
But still, every time I drove up to the house, it bugged me how much I disliked it. So the first thing I did was paint my door pink. This was done pretty poorly, because I did it myself, but at least it helped (a little). Then I decided that the orange brick was the next-worst spot, and my friend Erin helped me do a mortar wash on it. And then, when we had our kitchen done, I was so impressed by how excellent and affordable the painters were that I asked for a quote on painting the house, and: yes. (FYI, in case you’re local: I used Proficient Painters. If you click over to their site you’ll see pics of this makeover, but that’s not because they did the work for a discount or anything – I just liked them a lot, so I gave them pics to use in their gallery.)
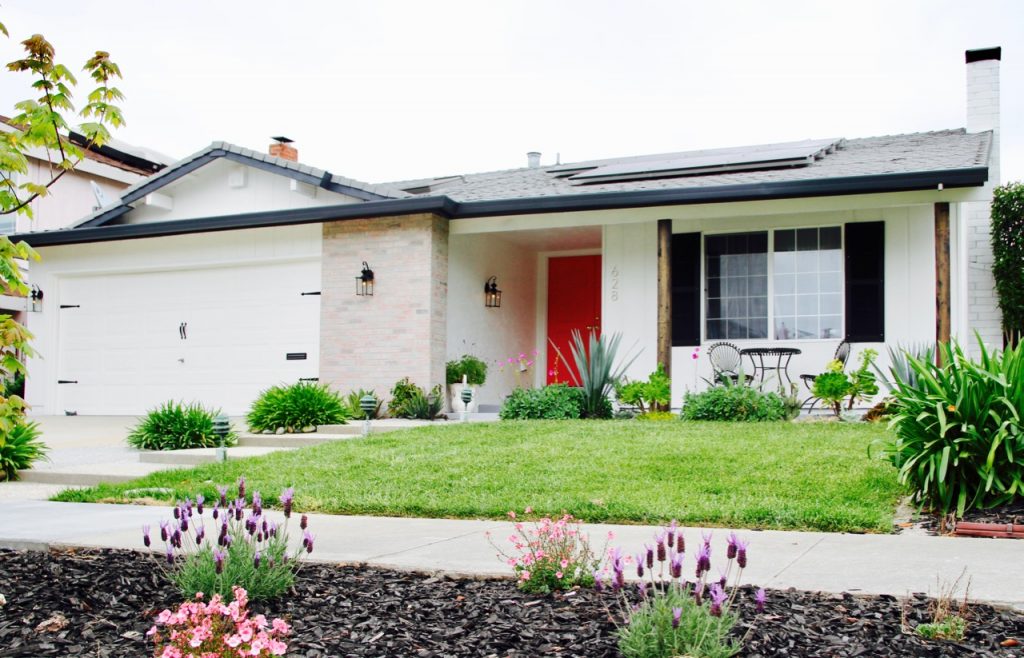
What I decided to do: give a sort of nod to the house’s 1969 build date with a mod-ish color palette of white, black and pink, and then figure out a few places to add high-impact details.
The Concept:
Take a dull 1960s ranch house and give it a bright, retro makeover with cool, textural details.
The Paint:
I knew I wanted to go for a white body with black accents (and the pink door, of course), but white-white and black-black don’t look great on houses (because of reflection issues and such). I picked up a few samples and painted swatches on all four sides of the house (so that I could observe them over the course of the day and see how they changed with the light), and ended up going with these shades:
- Kelly-Moore Swiss Coffee (a bright white that doesn’t hurt your eyes when the sun shines on it) for the body of the house;
- Benjamin Moore Raccoon Fur (a super-dark grey) for the trim;
- Kelly-Moore Power Grey for the front porch (meaning the ground, so I went with a deck paint);
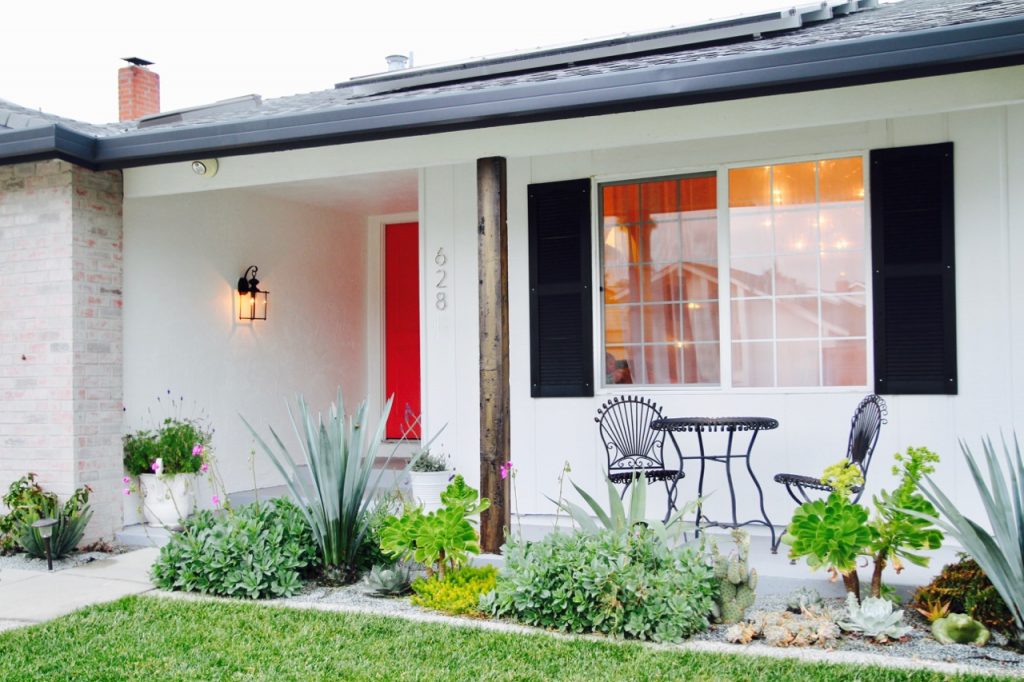
- Dutch Boy Coral Clay on the door (the same color as before, just professionally done this time).
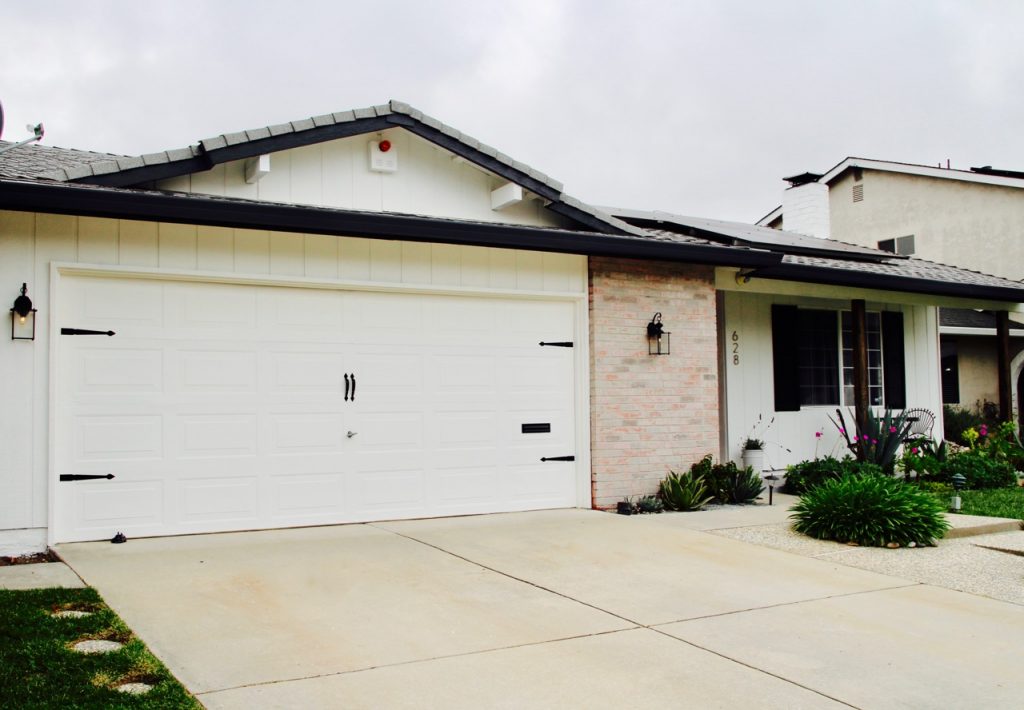
If you look closely at the before and after, you’ll see that I didn’t just put the dark grey everywhere that the blue had been before – I limited the trim color to the rain gutter and the fascia. I surprised the painters by not wanting to add any more accents or paint the posts dark grey, but I wanted to keep the trim feeling simple and striking…and I had other plans for the posts.
The DIYS:
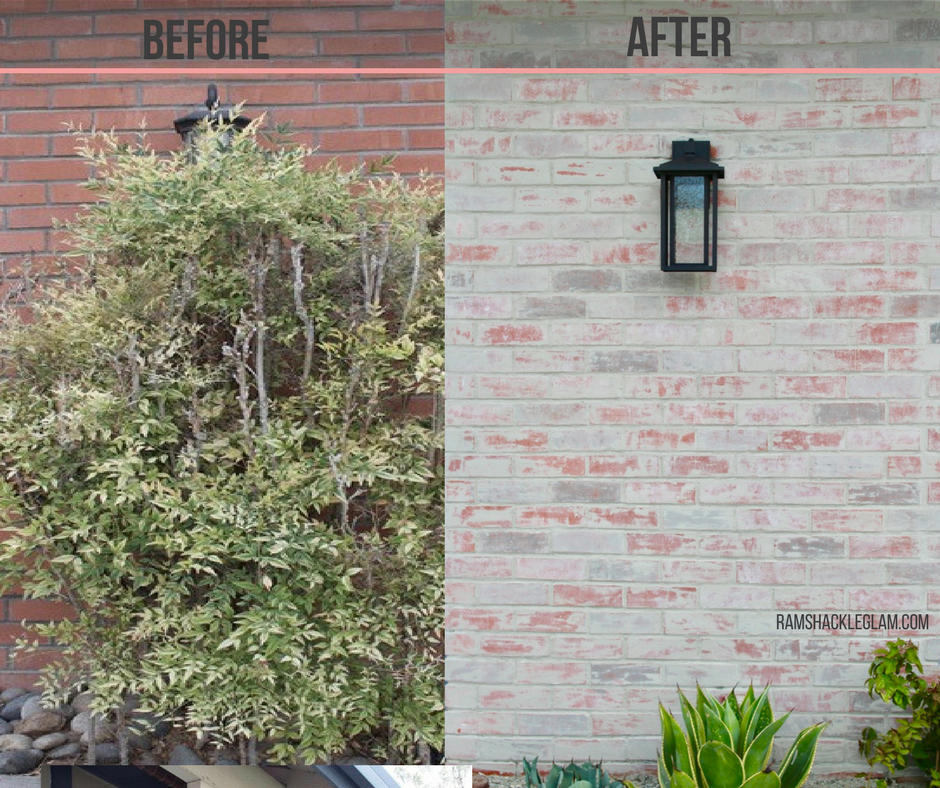
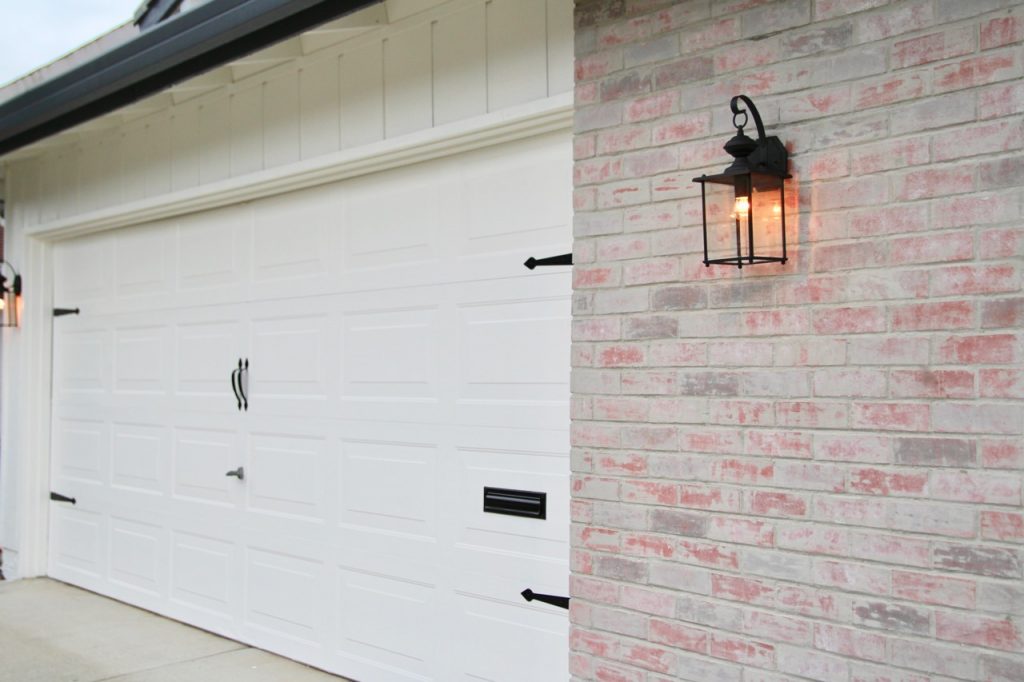
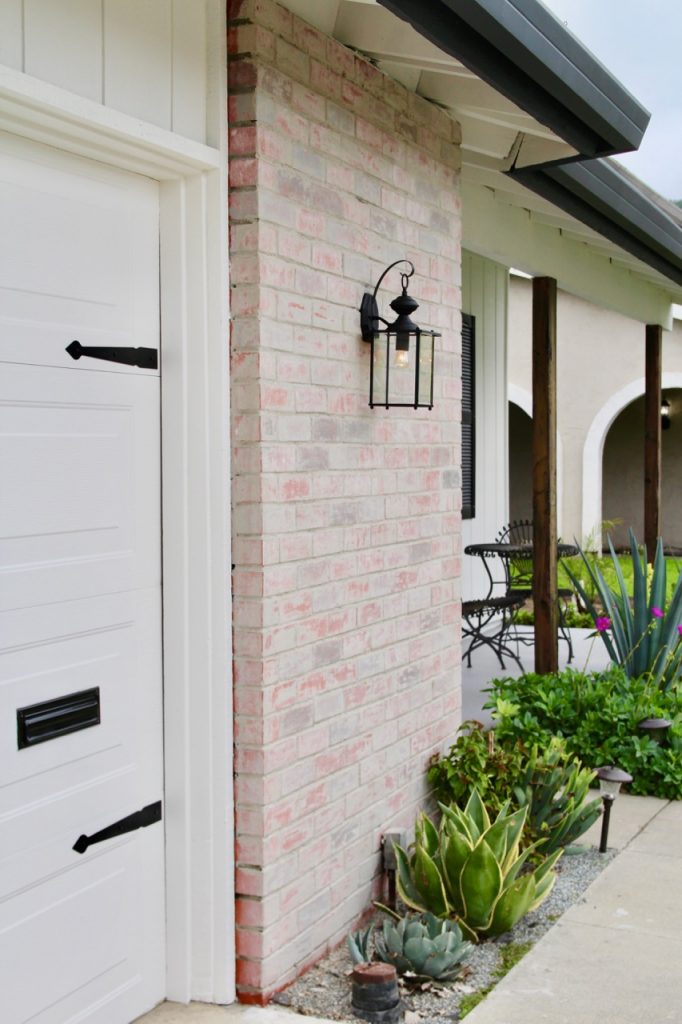
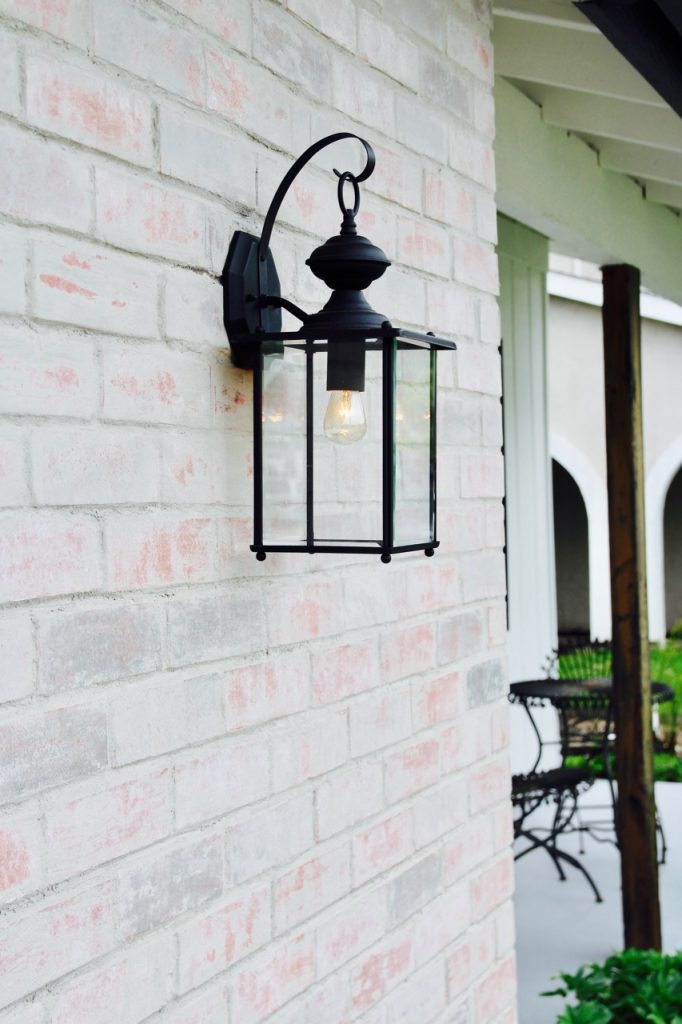
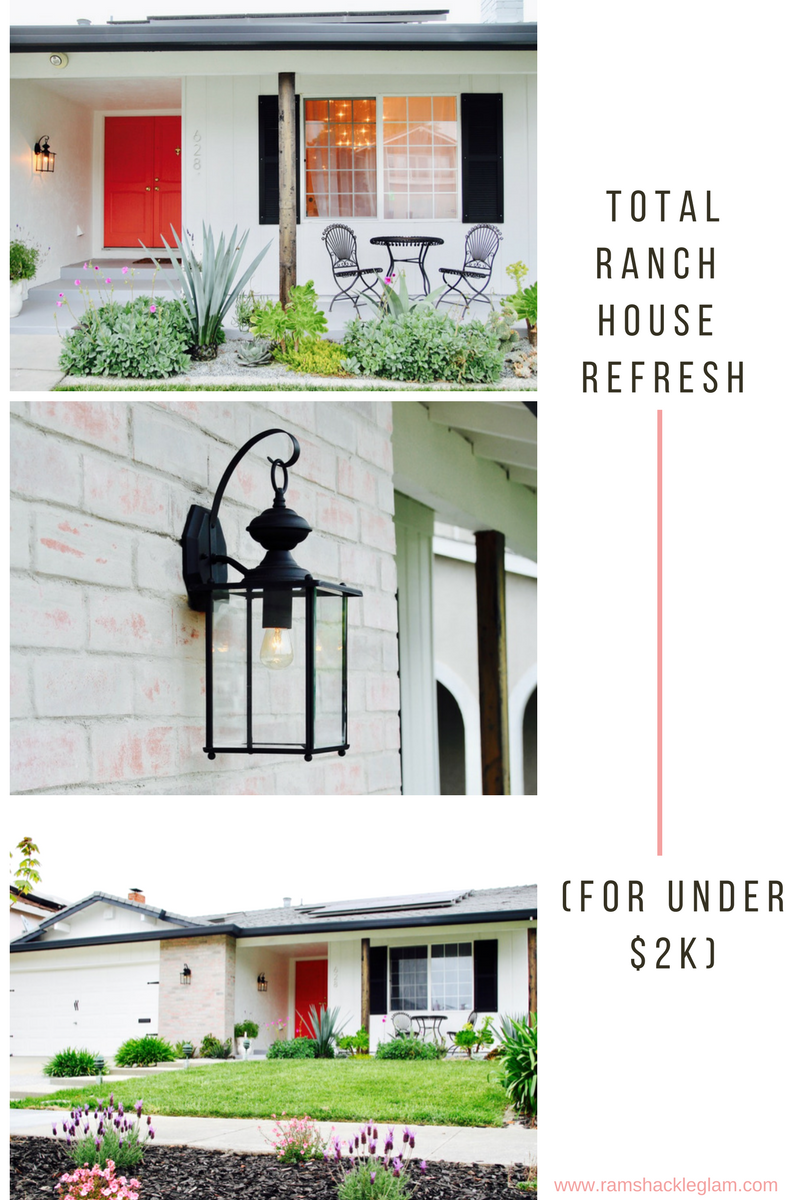
The Brick Wall: I initially considered just painting the brick white, but to me, all that says is “I painted over my brick because I wish it wasn’t there.” I wanted to try to make it a true accent wall, and worked with my friend Erin (who is a genius) to do a mortar wash (a.k.a. a “German smear”) which faded the color, added dimension, and gave the brick a more aged, distressed feel.
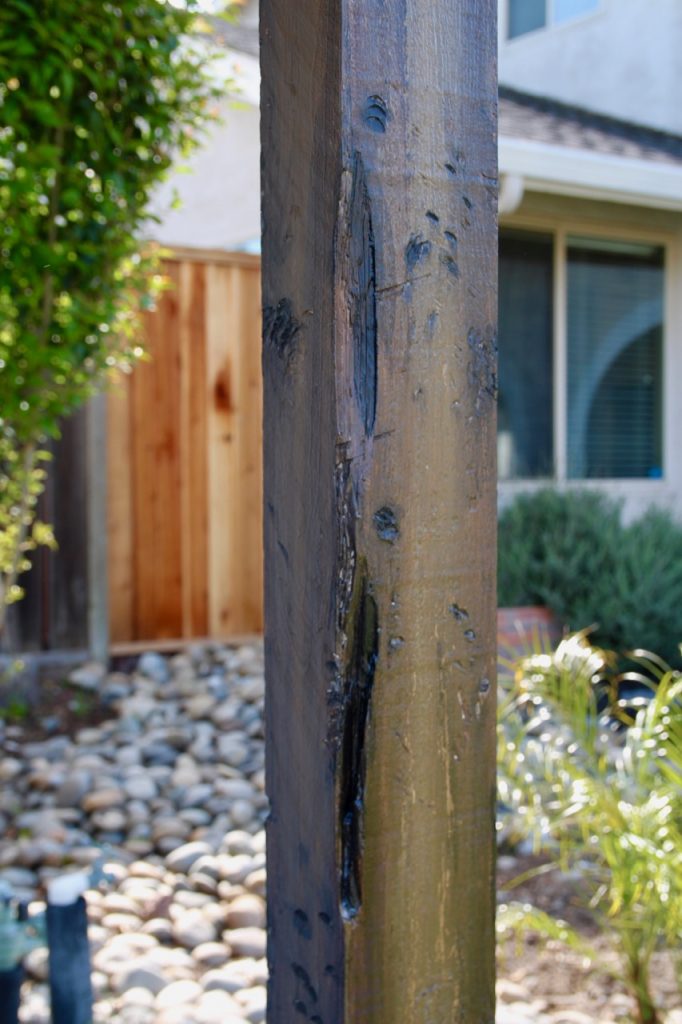
The Posts: My initial plan with the posts was to wrap them with barn wood to make them look cool and reclaimed, but that ended up being more of a pain than it was worth. I ended up hand-distressing and hand-painting them to look like expensive reclaimed wood…and it worked. (Really.)
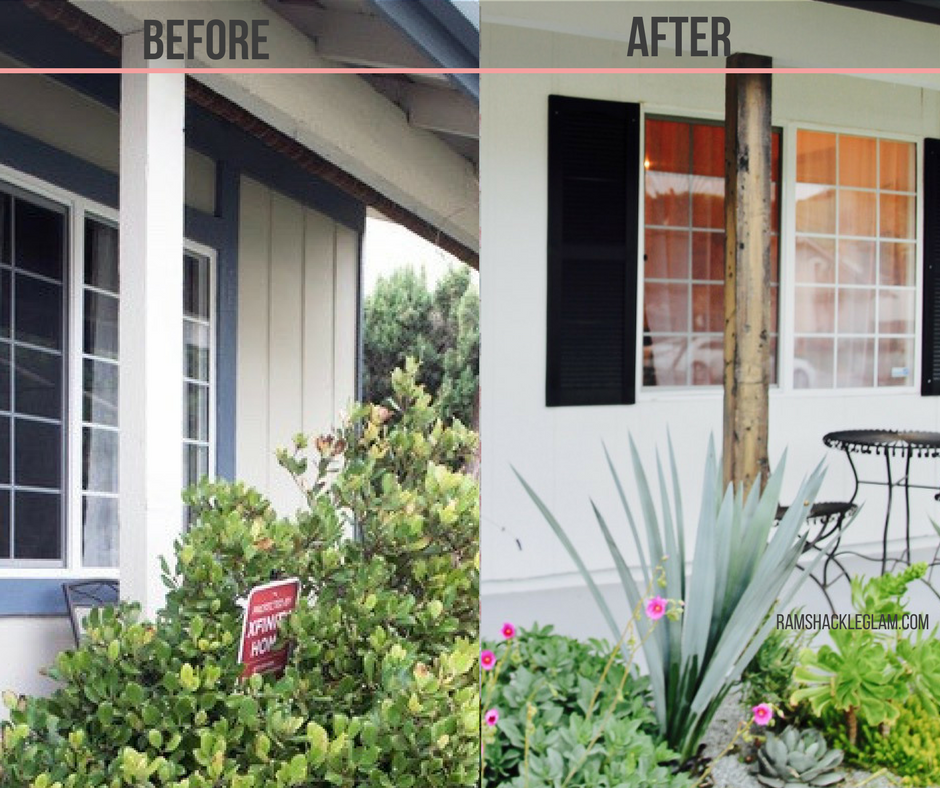
The Park Strip: This was sort of a separate project, because it arose out of necessity (the city workers tore up part of my park strip during the Great Sewer Disaster Of Early 2017 and I decided to just go ahead and rip out the rest of it, destroying my back in the process), but still: I think losing those bulky hedges made the property feel much brighter and more open. What I did was use a pry bar and a sledgehammer to chop out the rest of the concrete in the strip, then filled it in with black mulch and added an Autumn Blaze maple tree and a few low plants that do well in full sunlight.
The Details:
As finishing touches, I tried to find inexpensive accents that would really pop on the house (basically, bang-for-buck maximization). What I ended up adding:
Ekena Millwork Cathedral Shutters: These are black vinyl faux shutters (meaning they don’t close). I’m fine with that, because the point of them is purely decorative, and the vinyl really does look exactly like real wood (except it’s a bazillion times cheaper). The type I chose can be customized to fit whatever size window you have (and if you’re not sure what size to get, this guide is helpful).
Sea Gull Lighting Jamestown Lanterns: The amount of time I spent over the past two months talking and thinking about lanterns is honestly depressing. But they actually do make a big impact, and MAN they can be expensive. I considered a whole bunch of lanterns at a wide range of prices, and ended up picking the ones you see here as my favorites – despite the fact that they were among the least expensive options, at less than $80 apiece. I like the slimness of the frame and the simplicity of the glass (it’s not inset, doesn’t have any bubbles, etc), and the curved handle gives it a little elegance that I think suits the house nicely. I am aware that these are far too many feelings to have about wall sconces.
Garage Door Accents: Having grown up in New York City, I was unaware that garage doors were a thing that one could like or dislike. Aren’t they just…doors? Isn’t their purpose to…go up and down? Anyway, they’re apparently a thing that people get pretty design-y about, and spend a lot of money on. I learned this because I looked at the cost of replacing our garage door with one with windows (or anything non-boring, really), and it was wayyyy outside my budget. So I picked up some a carriage-house style garage door hardware kit, attached it to the door, and presto: non-boring. Or at least relatively non-boring.
The Price Tag:
- Painting (Labor): $1,000 (plus tips)
- Paint: $320
- Plants and Mulch: $150
- Supplies For Brick and Post Projects: $40
- Garage Door Hardware: $17
- Shutters: $170
- Lanters: $270
![]() TOTAL COST: $1967.00
TOTAL COST: $1967.00 ![]()
Still On My To-Do List:
- Replace the spidery puffball plants that line my driveway and the right side of the house with lavender.
- Replace the walkway lights.
- Replace the door handle with black iron to match the sconces…and then replace the knocker with this, because it doesn’t seem like an option.
But at this point, I feel more or less done. I love the result – I literally walk outside at night just to stand there and gaze upon the mortar wash – and cannot believe that my blah little house turned into something that is so precisely what I was looking for all along.