
Oh, look: it’s tassel day on Ramshackle Glam!
We’ll get back to our regularly scheduled, non-tassel-related programming tomorrow, but in the meantime, here’s how you make ’em. (Seriously it’s so easy.)
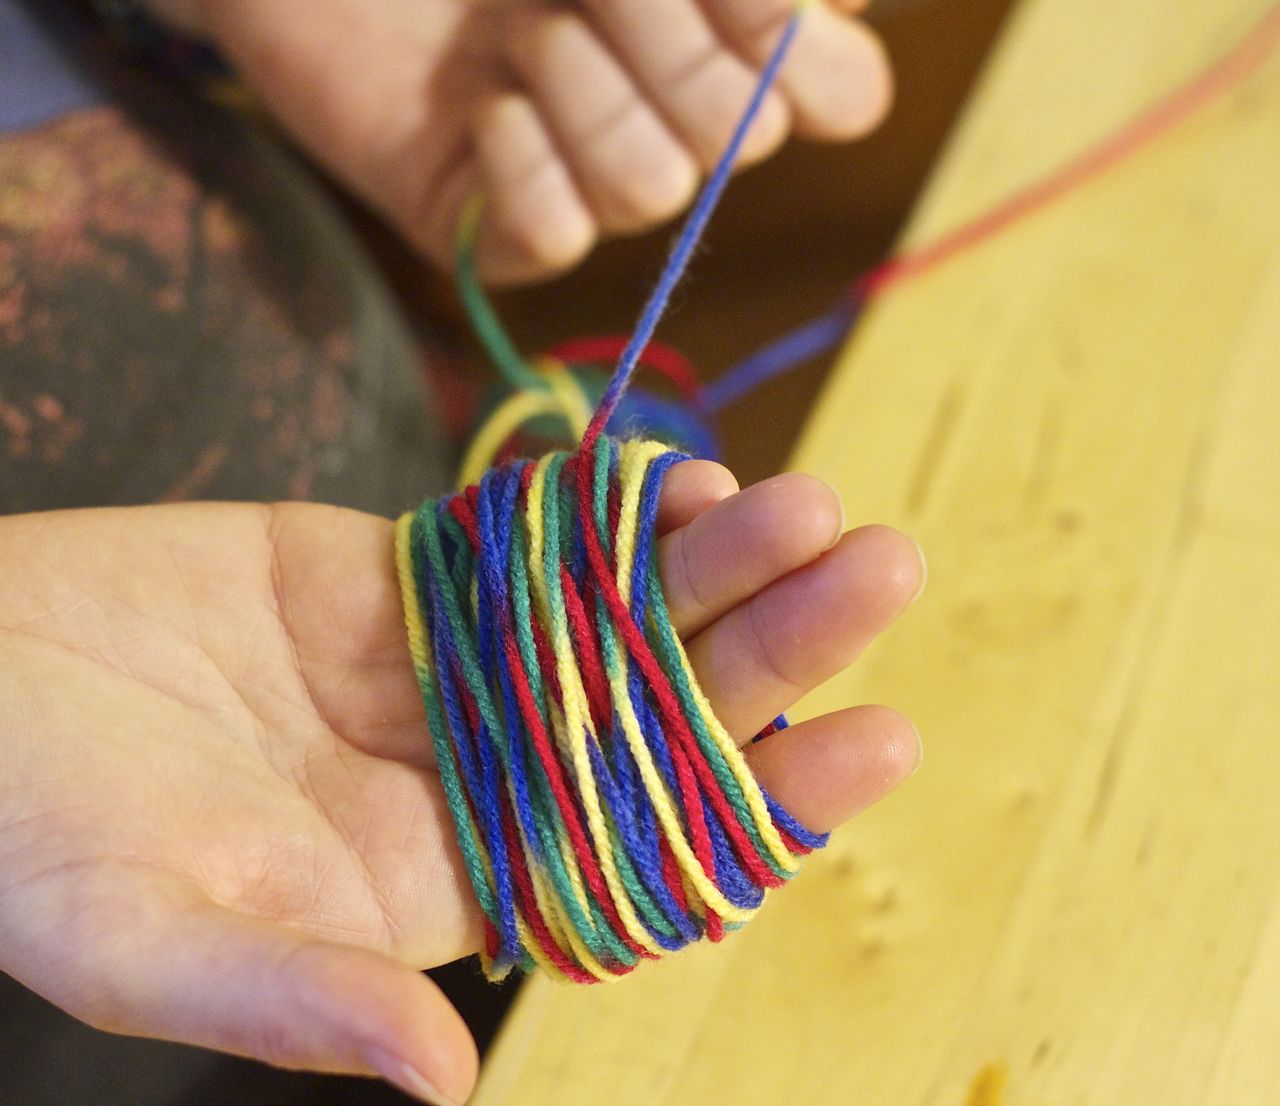
Step 1: Wrap the yarn of your choice around your hand a whole bunch (I went for 65 times to make the tassels pictured here, but it’ll depend on how fluffy you want them to be and the size of your yarn). Cut the thread and slip the looped yarn off of your fingers, being careful to keep that hole in the middle.
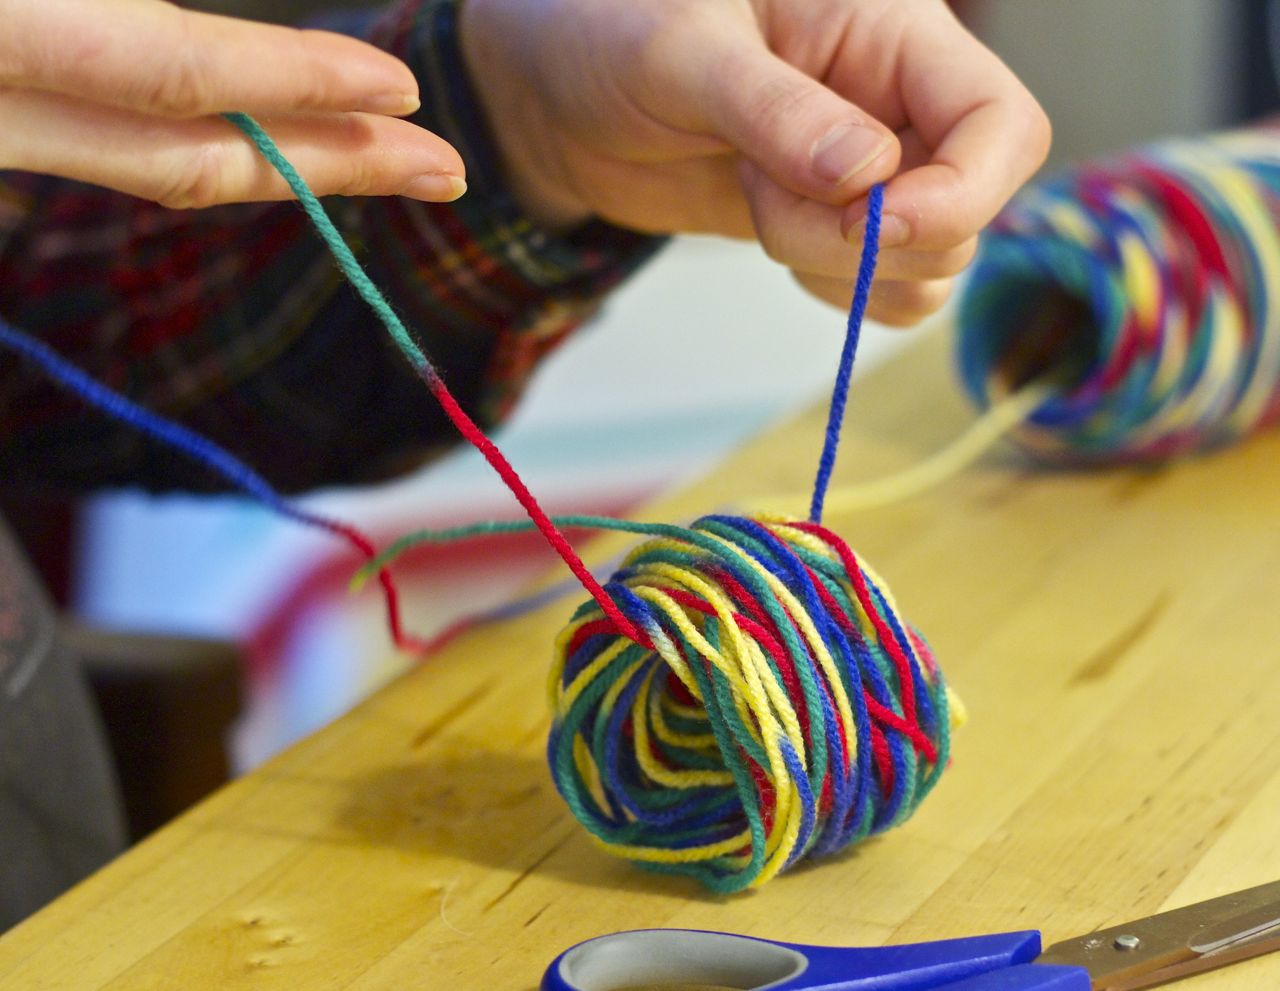
Step 2: Cut a piece of yarn about 8 inches long, and thread it through the hole.
Step 3: Tie it tightly as shown, and then knot it again to secure.
Step 4: Stick your scissors into the center of the loop and cut through all the yarn on the opposite side of where you tied it in Step 3.
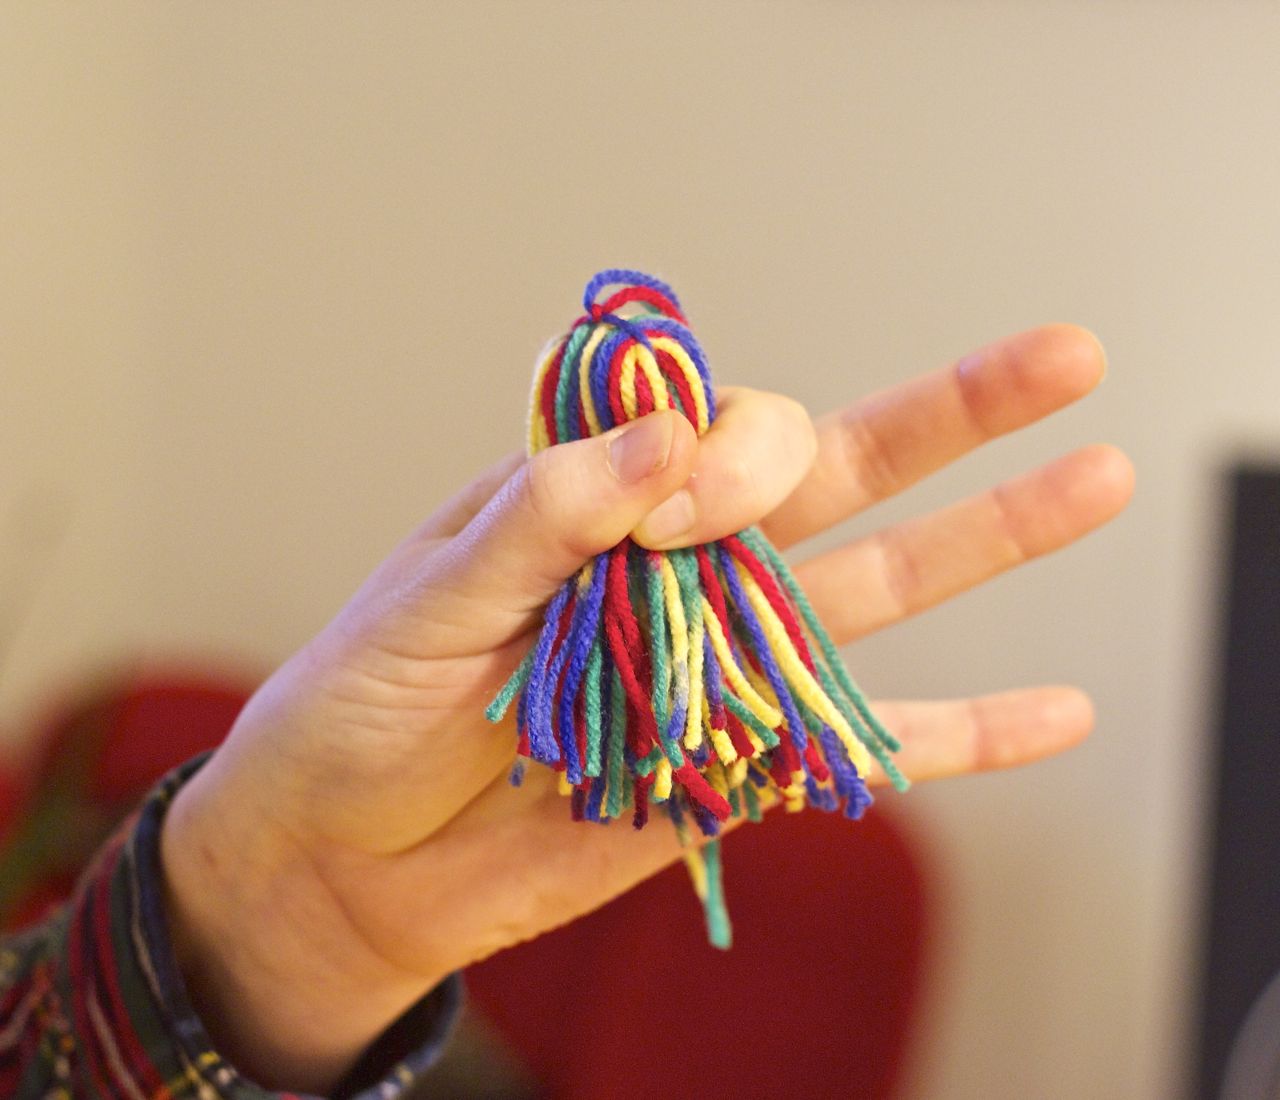
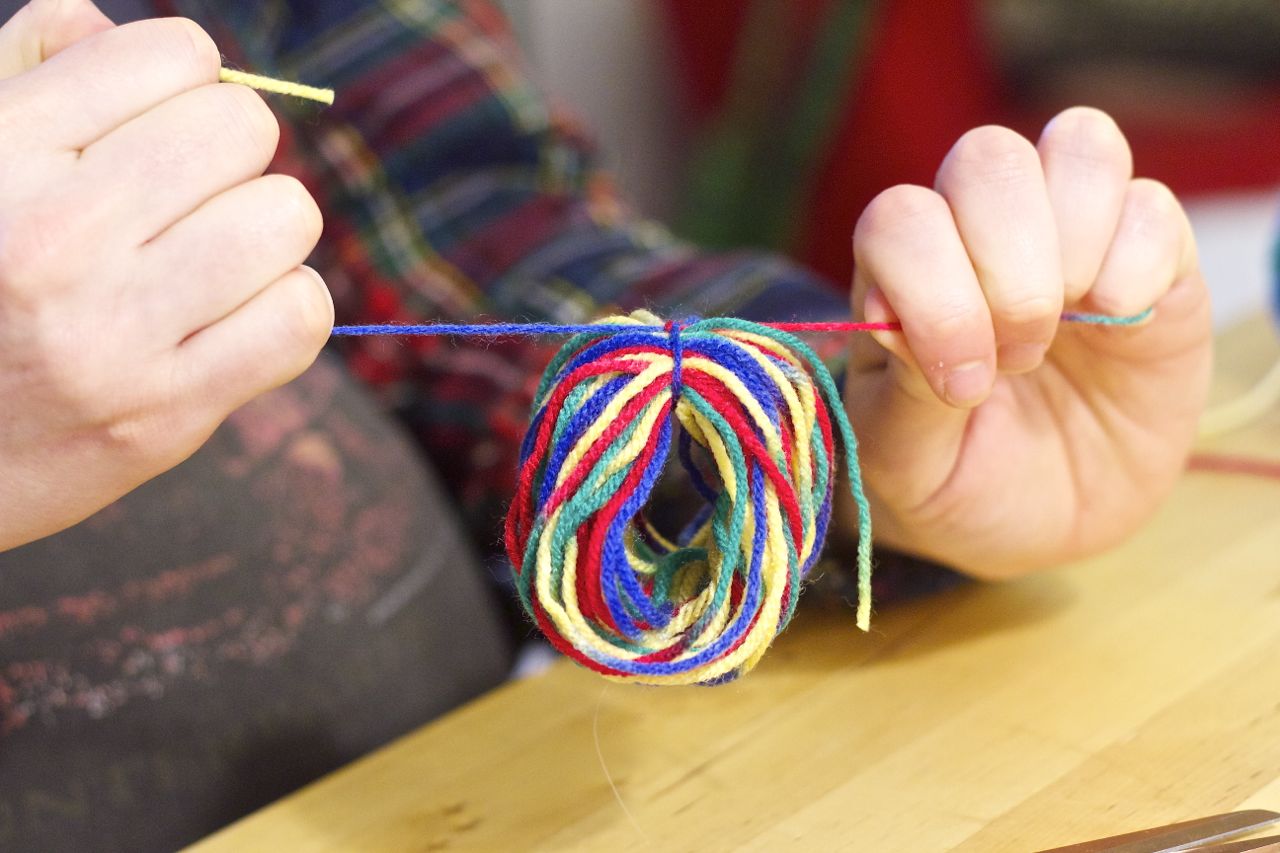
Step 5: Keeping that piece of string that you tied on at the top, flip down all the yarn so that it faces in the same direction.
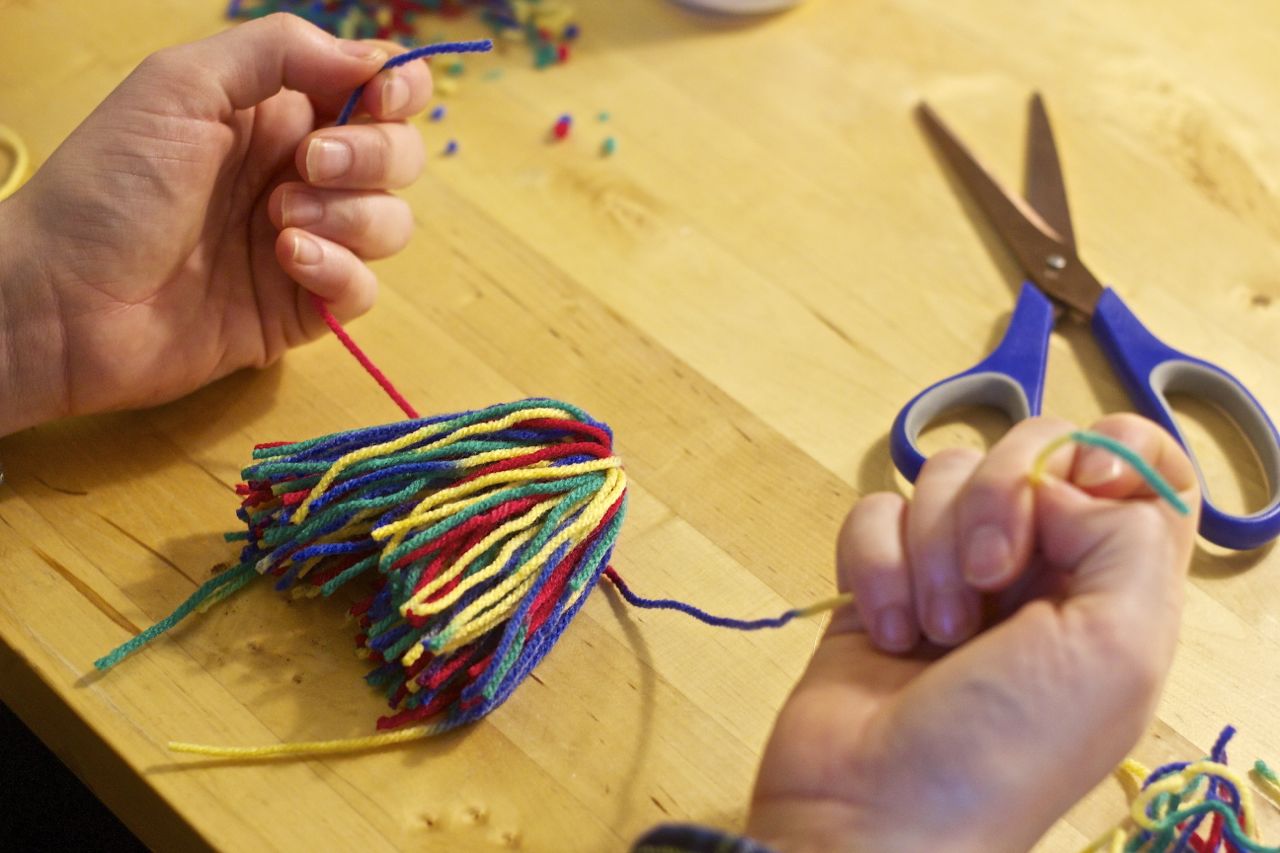
Step 6: Now cut another piece of yarn (about 8 inches should do it) and lay it down underneath your tassel as shown.
Step 7: Tie it off.
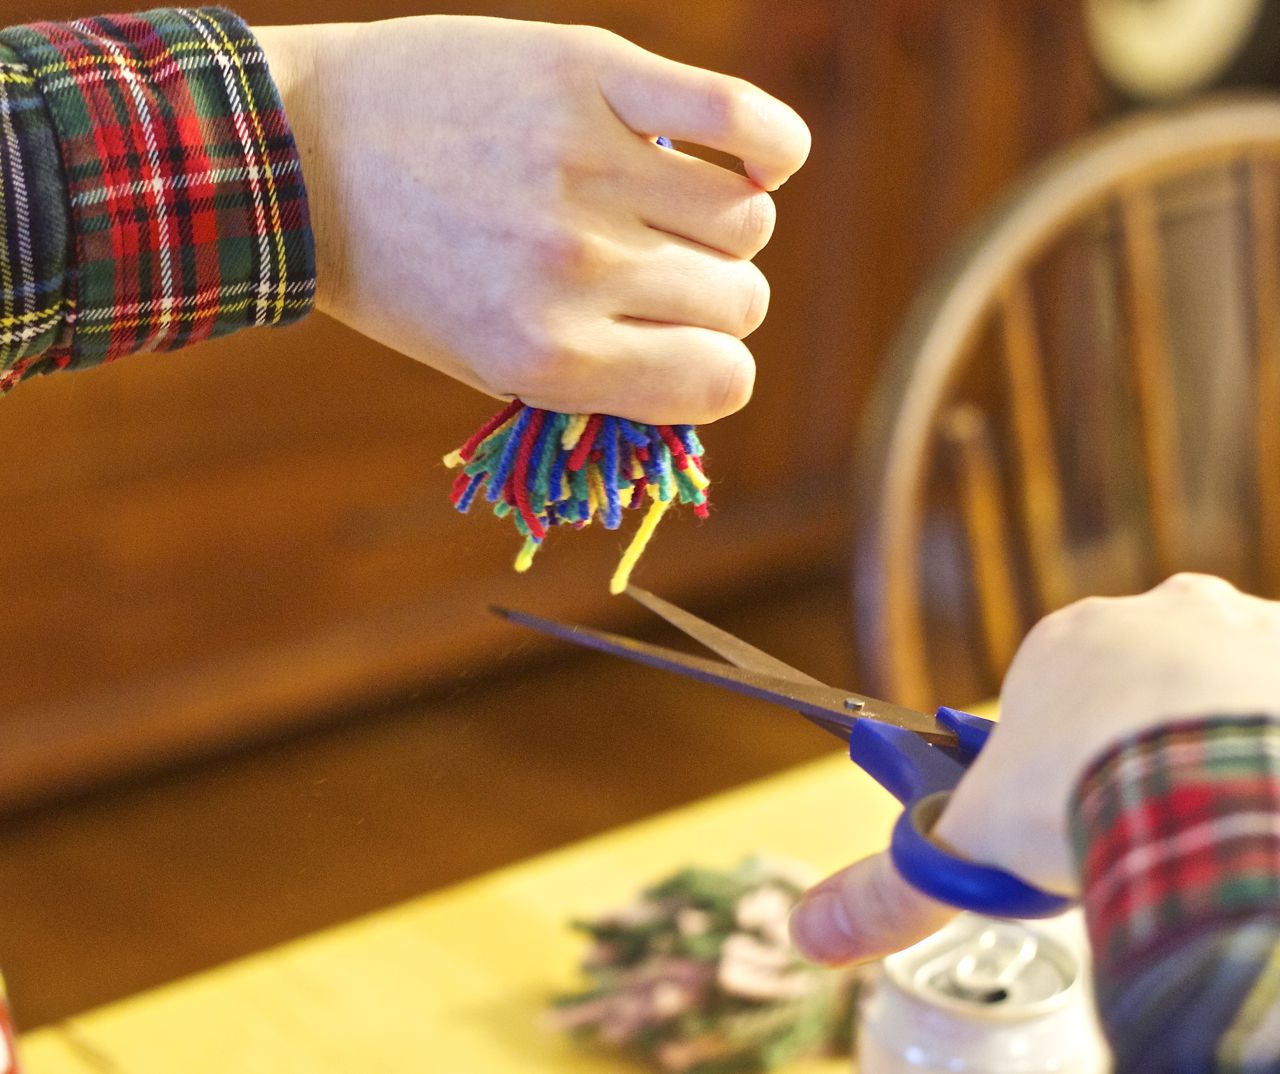
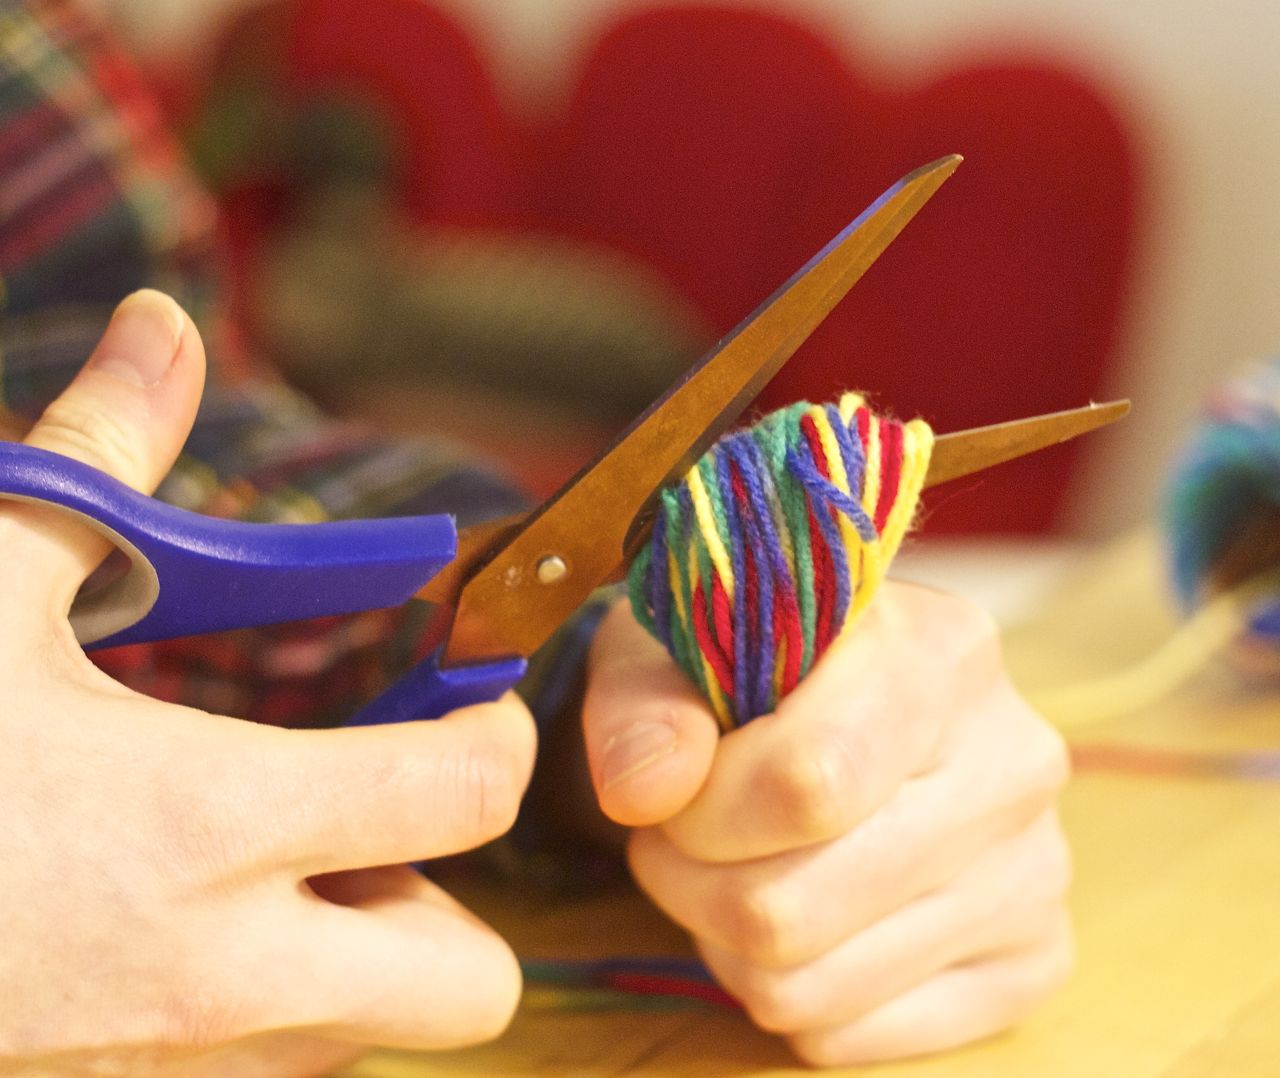
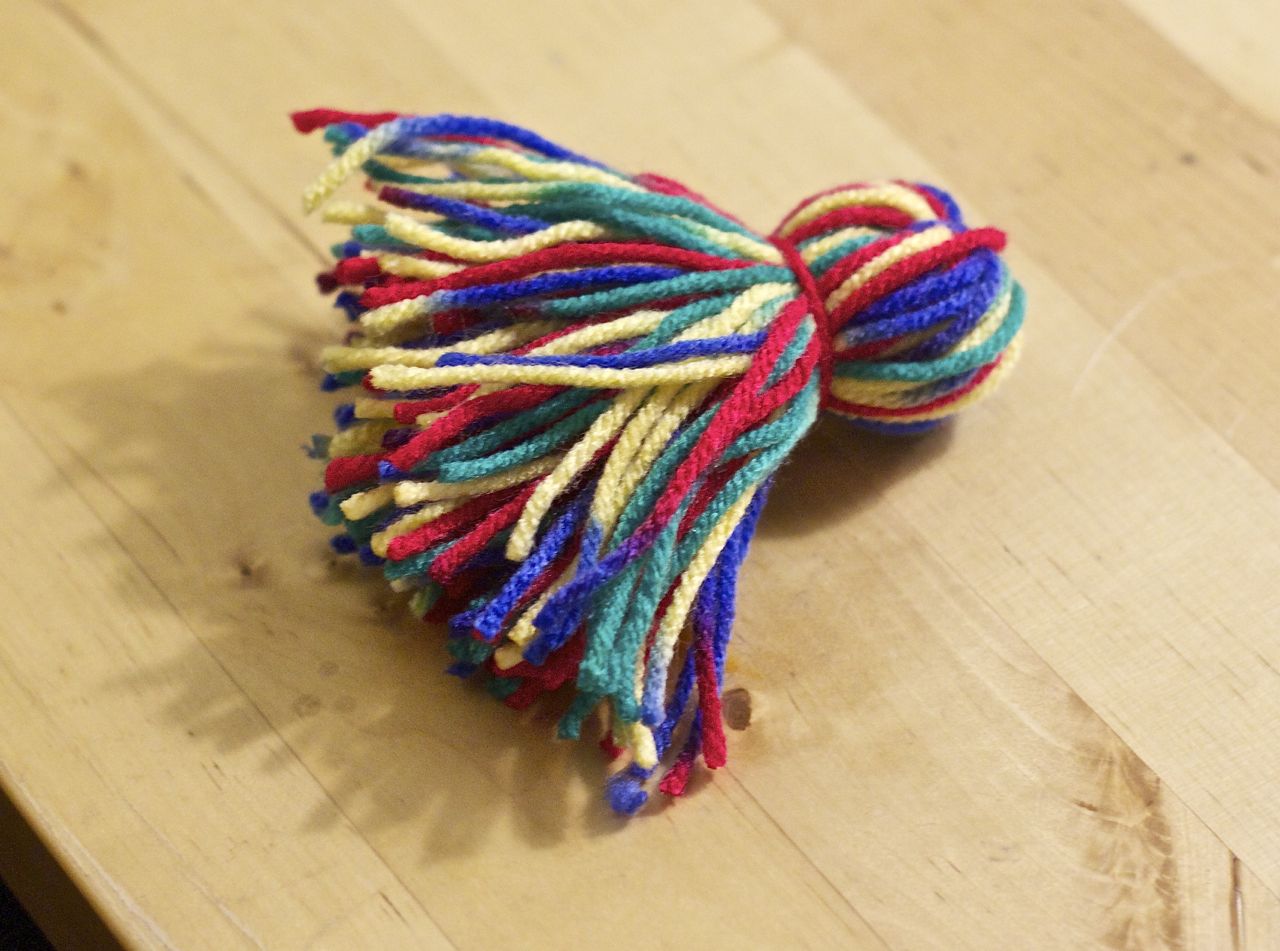
Step 8: Give your little guy a haircut, so that all the yarn hanging down is the same length.
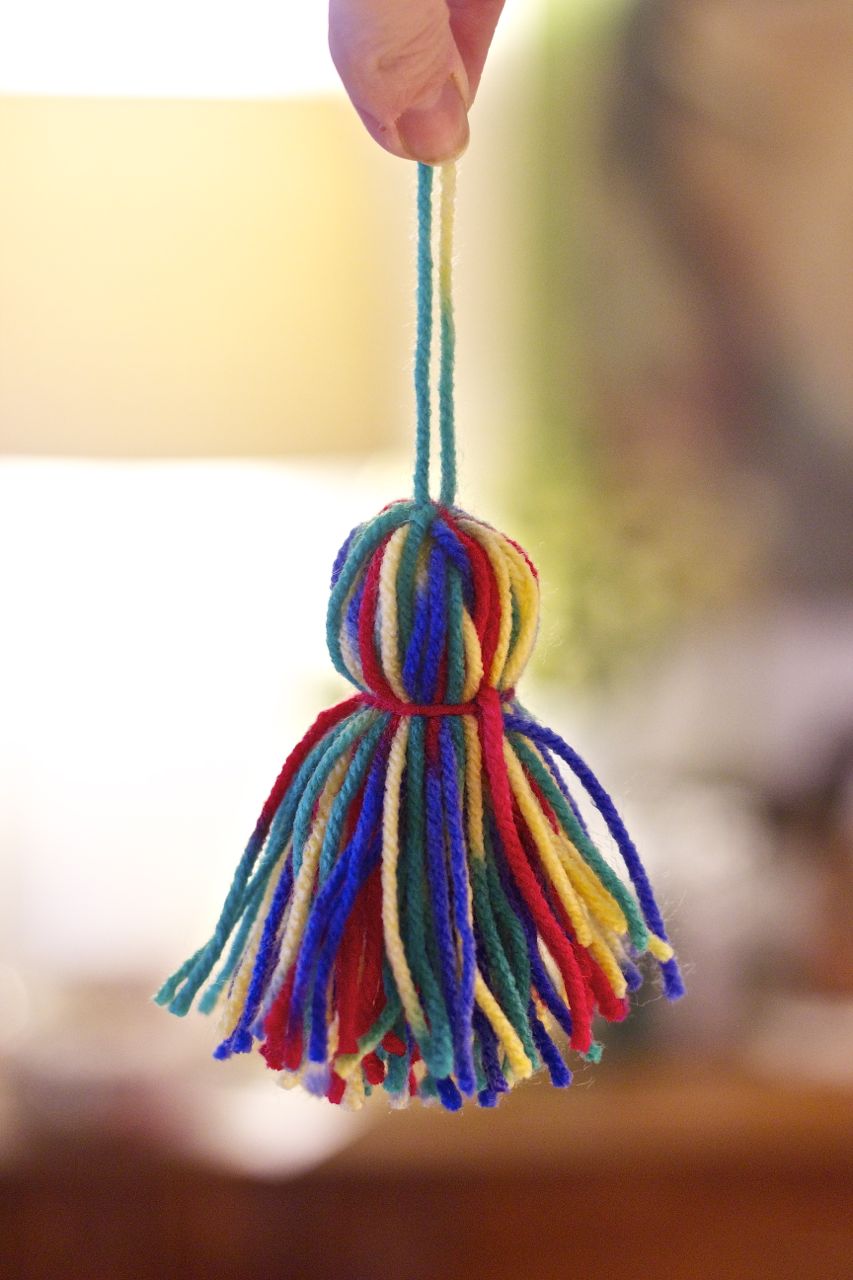
Aaaaand done. So easy. So cute. (Use that little string you tied on in Step 3 to secure the tassel to whatever you want it secured to.)
Big thank-you to Erin for teaching me this technique (and for being an extremely patient hand model).
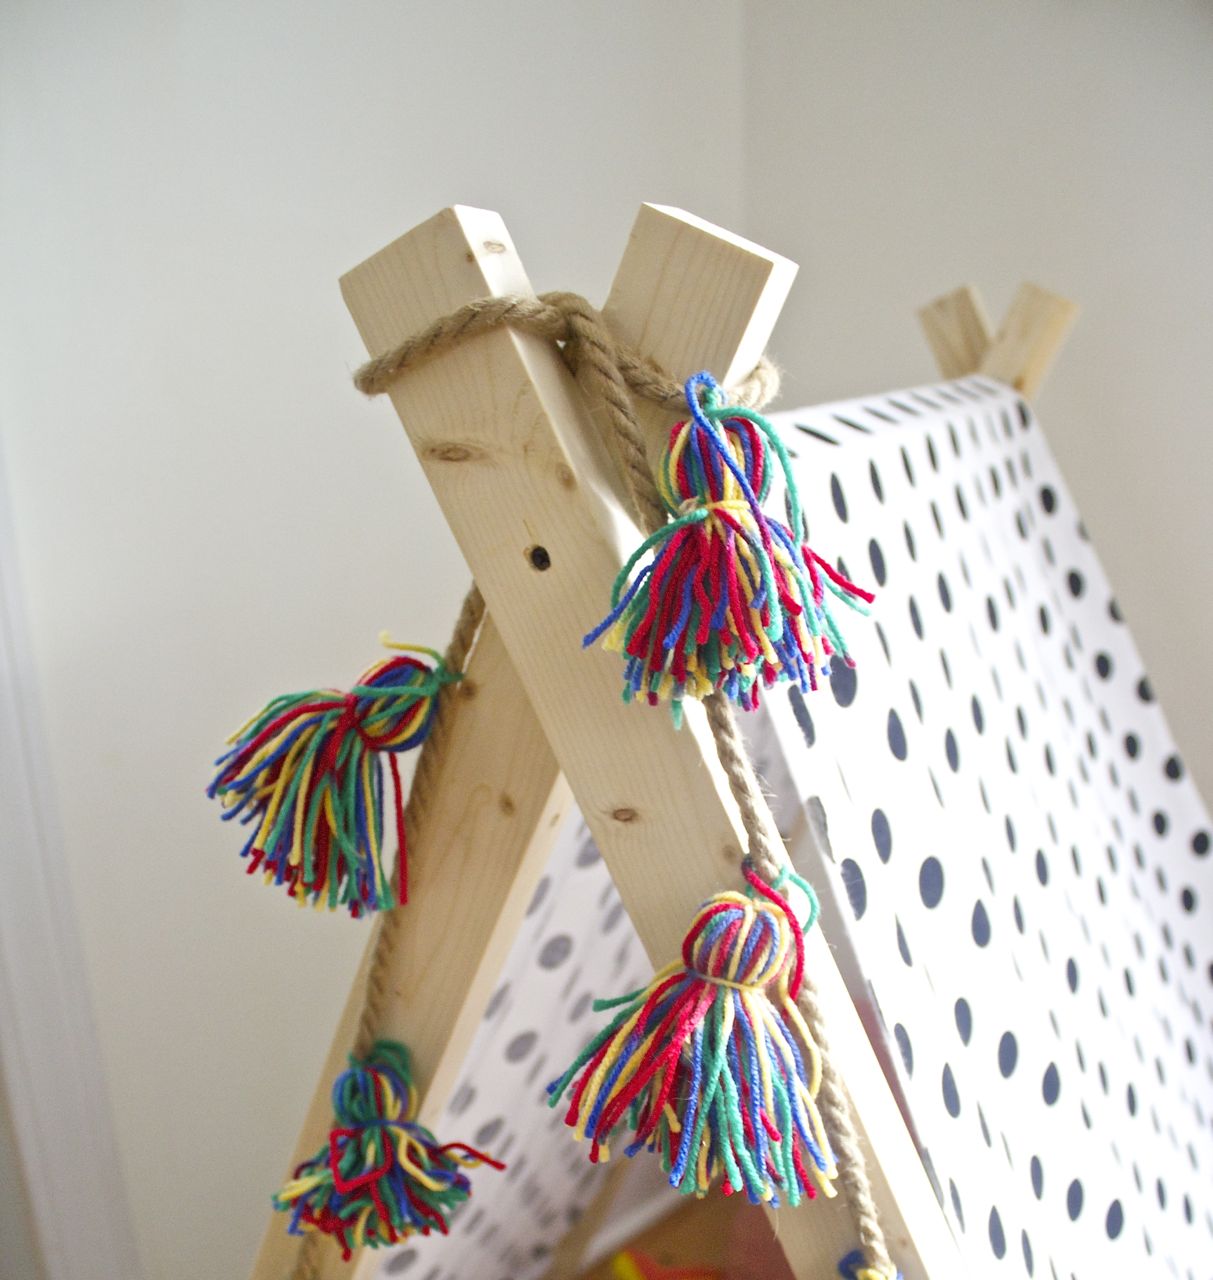
Click here for lots and lots of fun ideas for how to use these adorable things.


