I cannot stop making dreamcatchers these days.
I’ve always loved them – the tattoo on my arm is inspired by one, and I’ve had a huge one hanging in our house ever since my dad and I picked it up on our post-college cross-country drive – but what happened to ignite the recent obsession was that I found one on the Internet that I was completely over-the-moon about.
(It’s this one, if you’re curious.)
That is, I was over-the-moon about it until I realized that the thing is OVER FOUR HUNDRED DOLLARS.
FOR A DREAMCATCHER.
I mean that is insane.
And when I showed the picture of my lust object to my friend and fellow crafting obsessive Erin, she agreed both that it was extremely gorgeous and completely insane. And so we decided to make them ourselves.
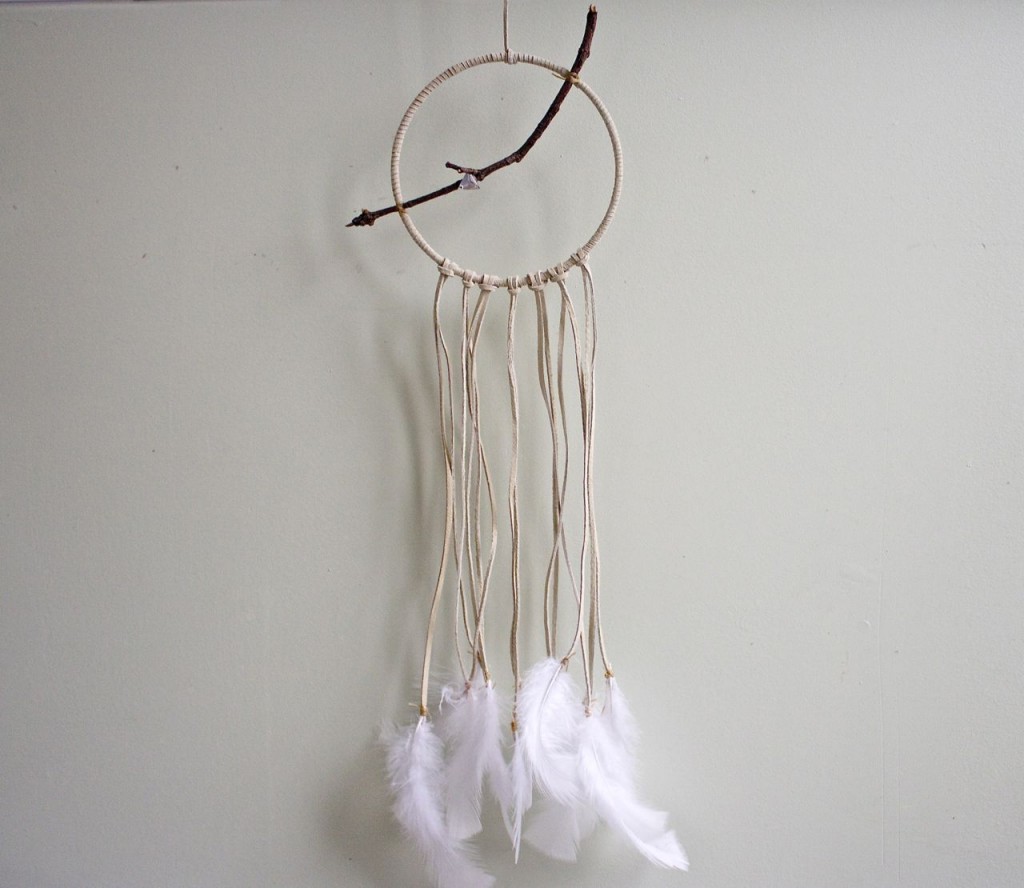
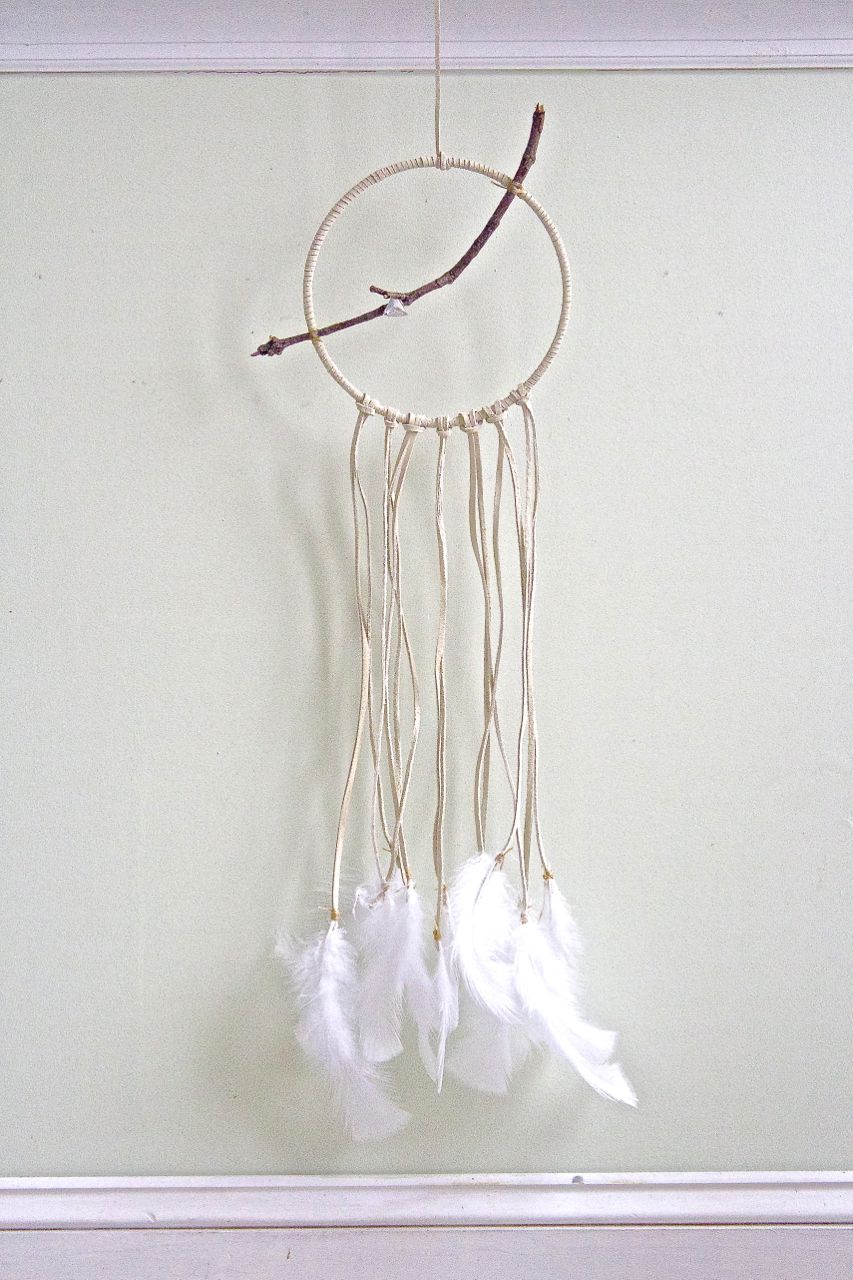
As evidence of just how easy the things are to DIY, that one pictured up there is the very first one I ever made (I’m on Number 5 right now, and am working up to making the white-and-red-feathered, super-sized creation of my fantasies to hang above our bed), and it took me about an hour. An hour and ten minutes, if you count the time I spent hunting around in my yard for a perfectly-shaped stick.
So. Want to join me in my pursuit of making All Of The Dreamcatchers?
Here’s what you’ll need:

(Oh, and you’ll also need a branch if you don’t want to weave a web into the center…which I didn’t.)
Now, a helpful little step-by-step (and ignore my nails in these photos, please and thank you).
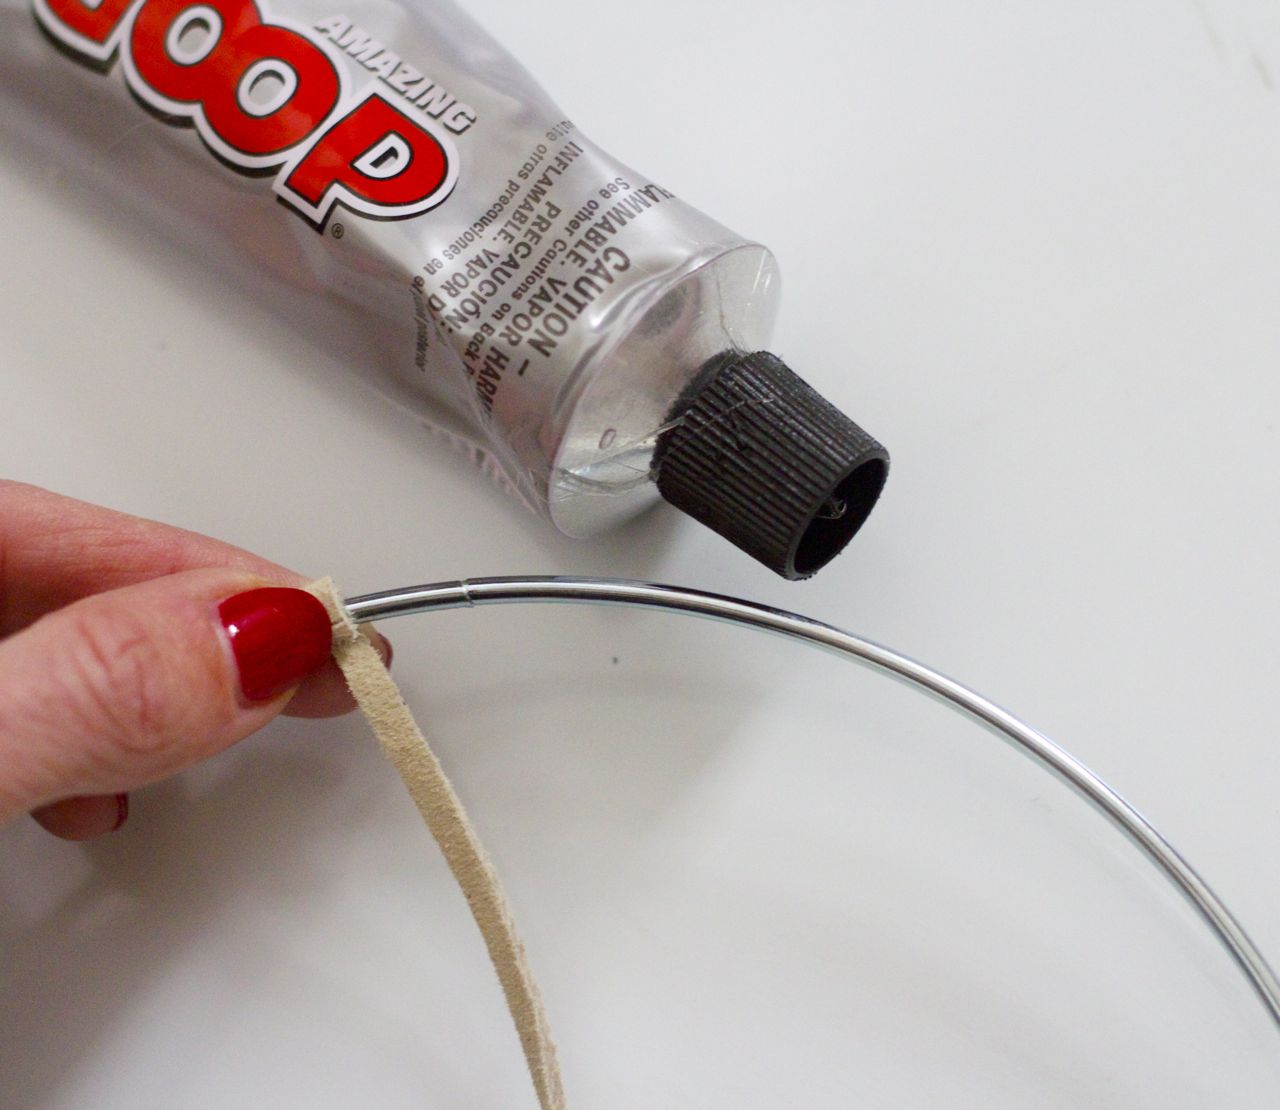
Step 1: Cut your suede lace – to wrap the hoop, you’ll need about eight times the diameter of the hoop you chose (don’t forget that you’ll need more to create the hanging laces). Use a small amount of Goop (or a similar glue) to affix one end of the suede lace to the hoop. Hold in in place for a minute or so to make sure it’s secure.
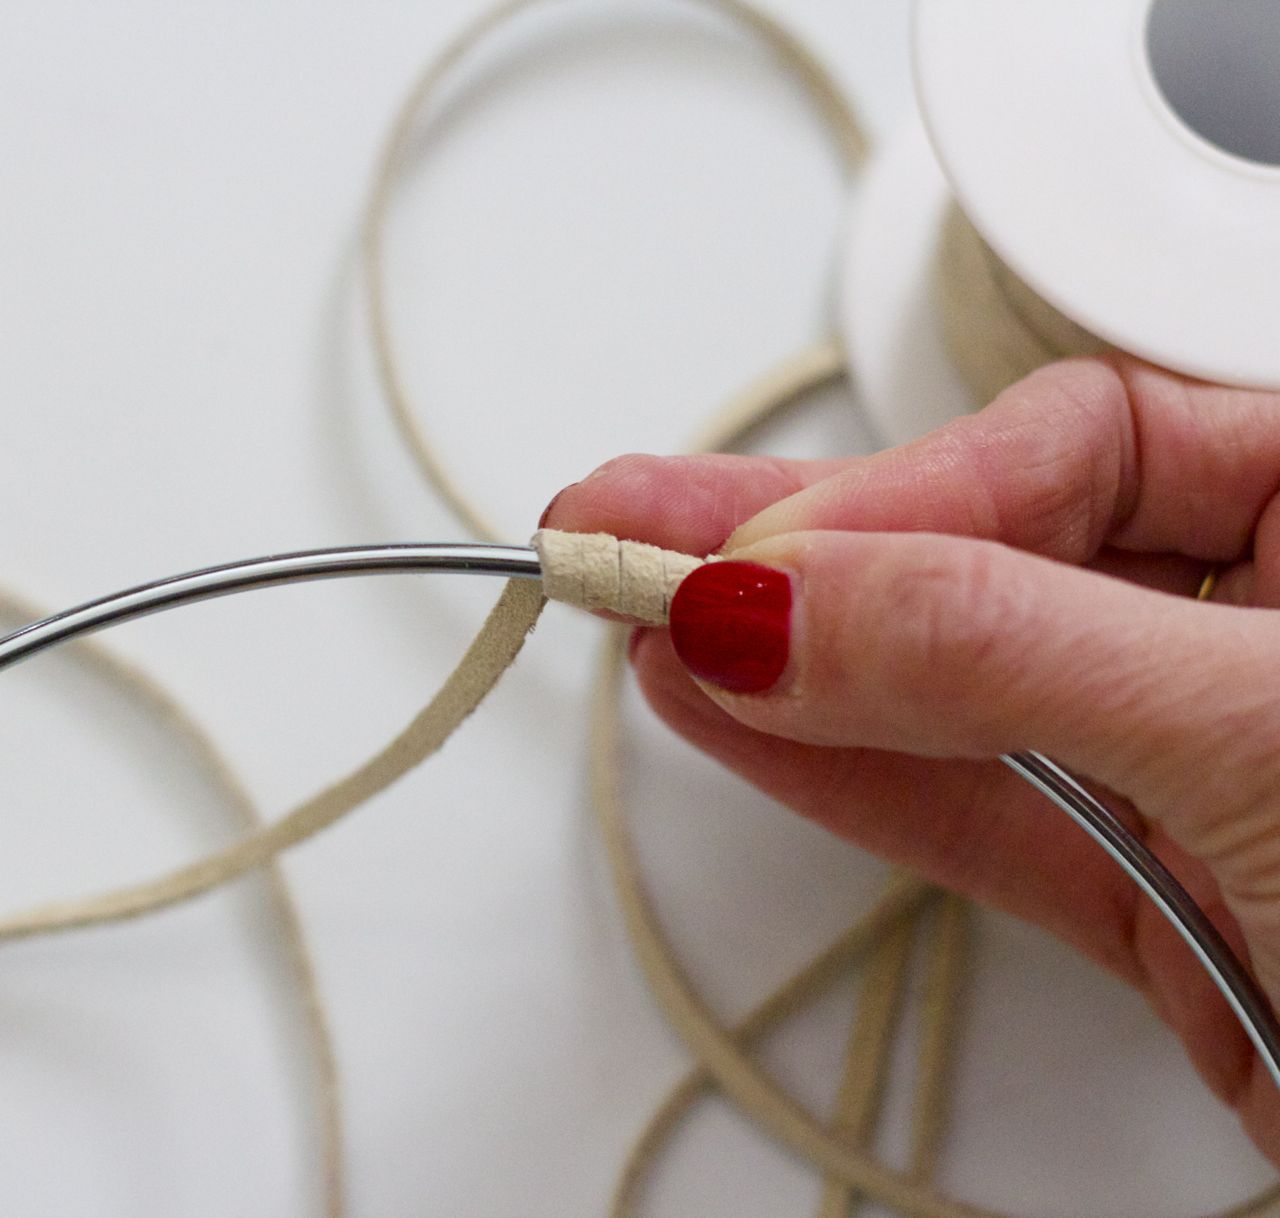
Step 2: Wrap the suede lace tightly around the entirety of the hoop, making sure there are no gaps between loops.
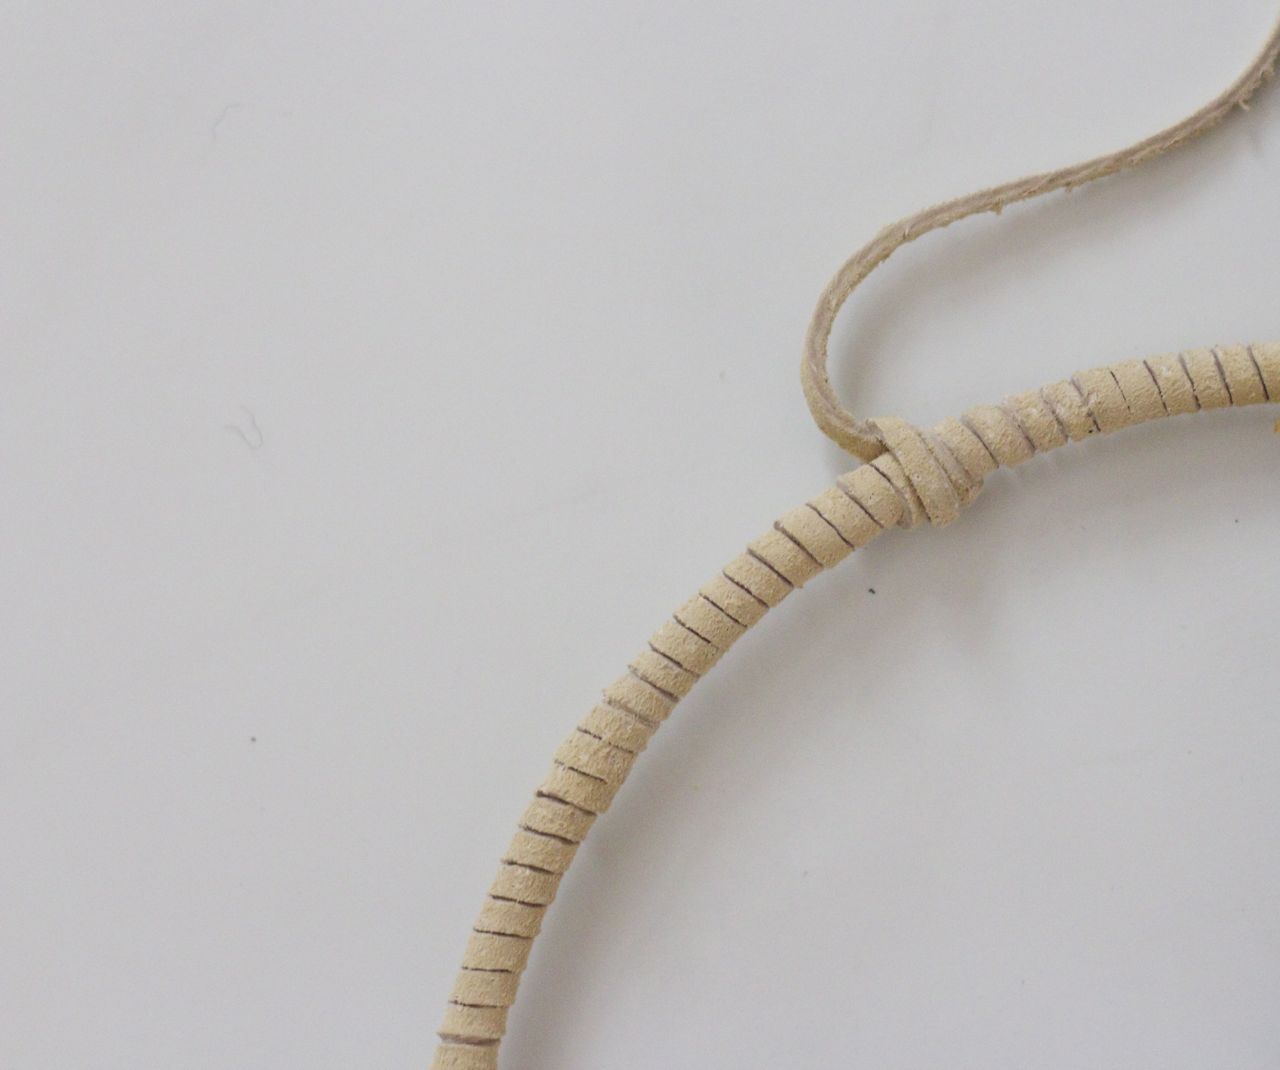
Step 3: Once you’ve finished wrapping the entire hoop, wrap slightly beyond where you started, and then take the end of the lace and weave it back under the second-to-last loop, forming a half-stitch. Make a loop out of the loose end to hang your dreamcatcher with (or just leave it alone and hang it with a tack if you prefer).
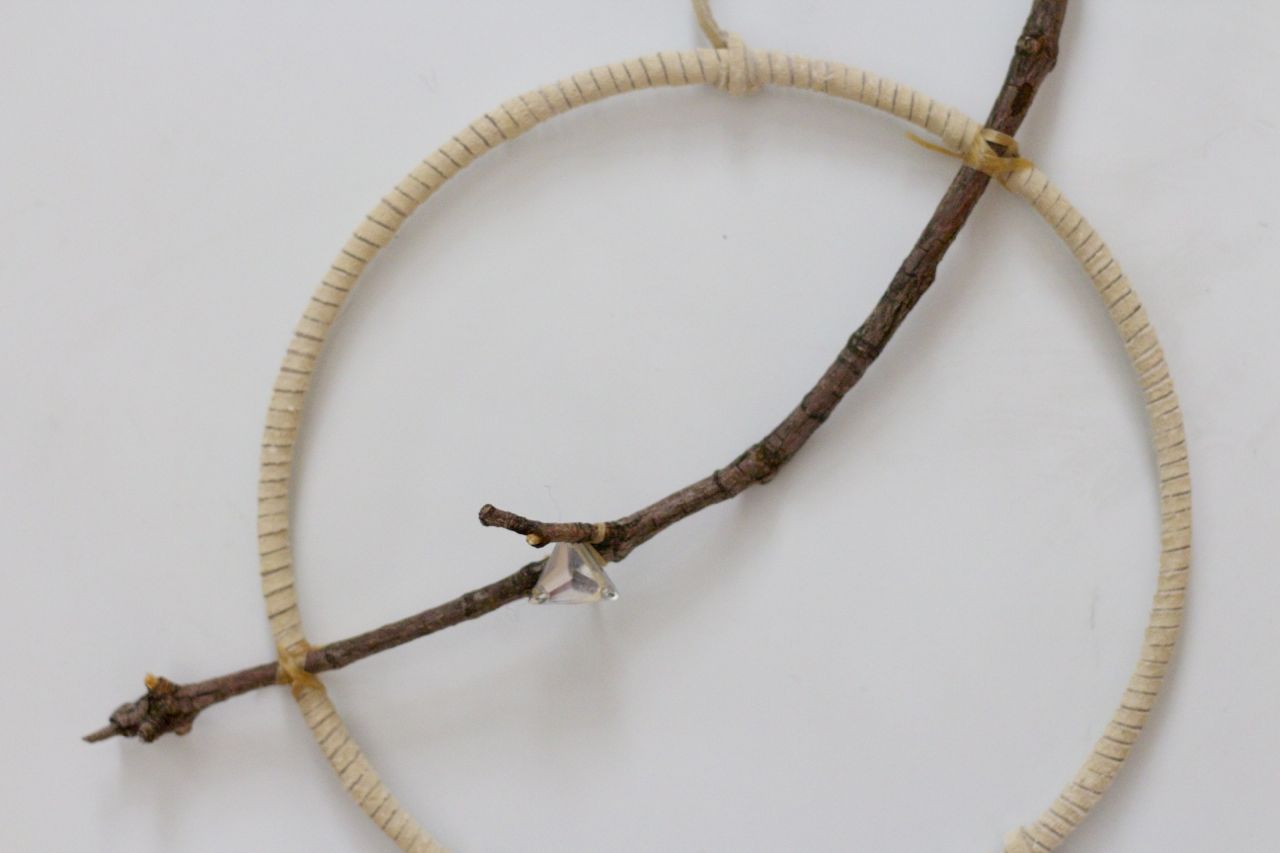
Step 4: Use sinew to tie your stick (or whatever you’ve chosen as your centerpiece) to the hoop. I also used sinew to affix a crystal accent to the branch. For an accent, you can use a bead, a feather, a stone – even a piece of costume jewelry. Whateva.
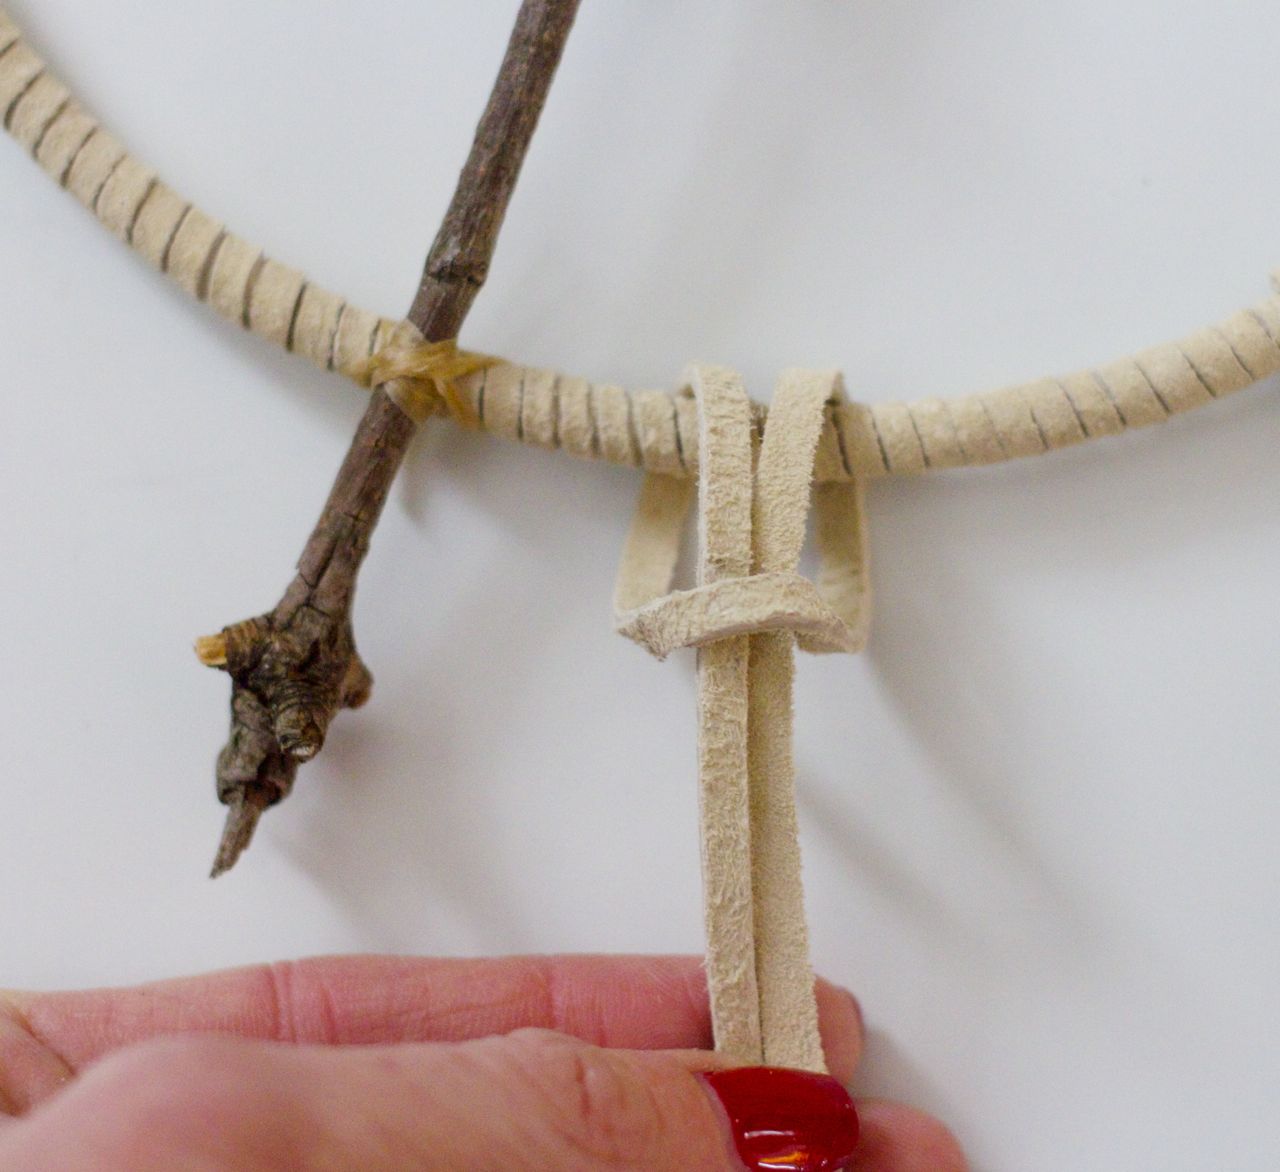
Step 5: Now, create the hanging laces. Cut a few pieces of suede lacing (I went for about 2 feet each so that they’d hang 1′ below the bottom of the hoop when doubled over, but it depends how long you’d like them to hang) and loop one onto the hoop as pictured above. Then repeat with the rest.
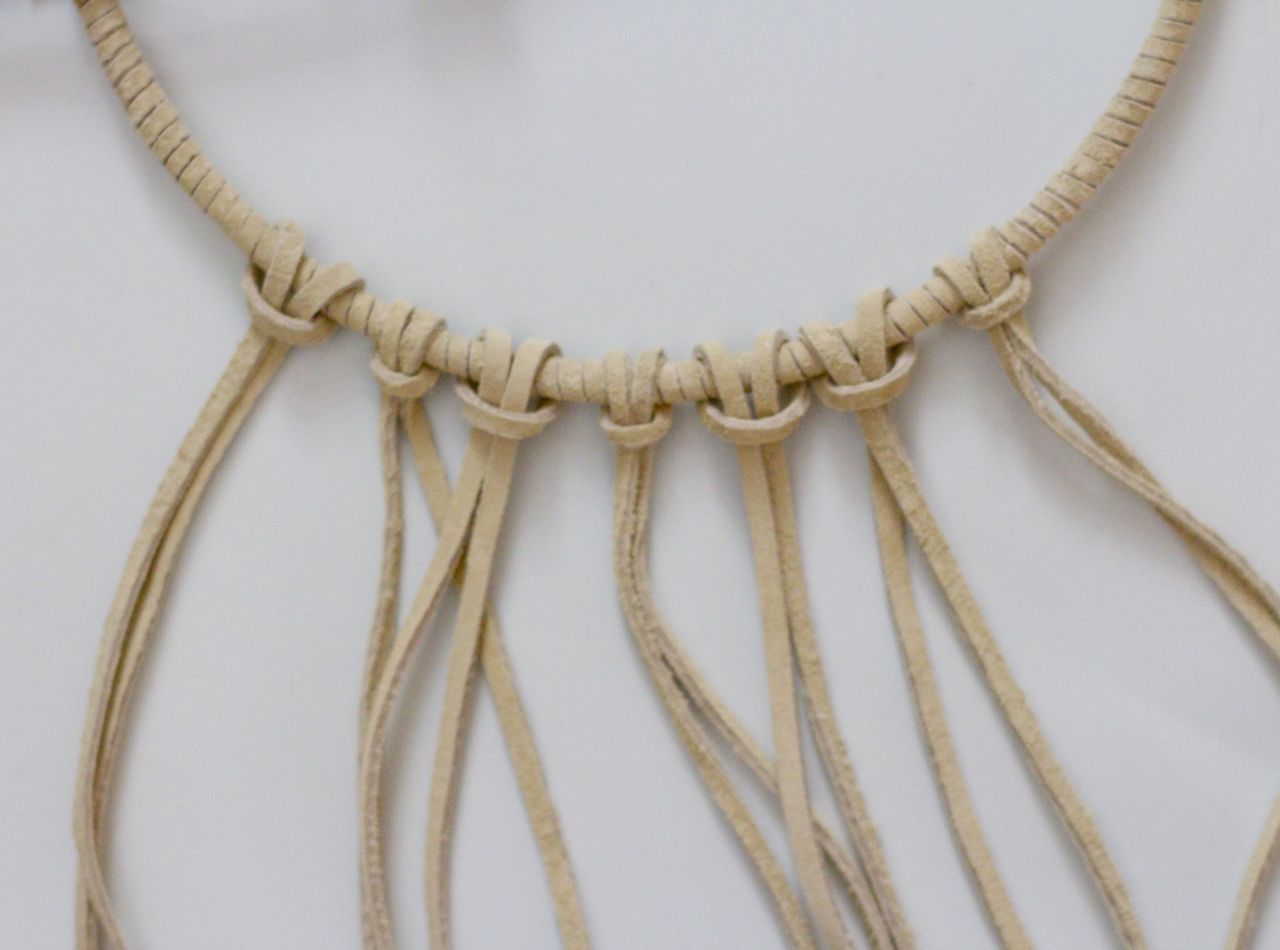
Like that. Yank on them a little to tighten them.
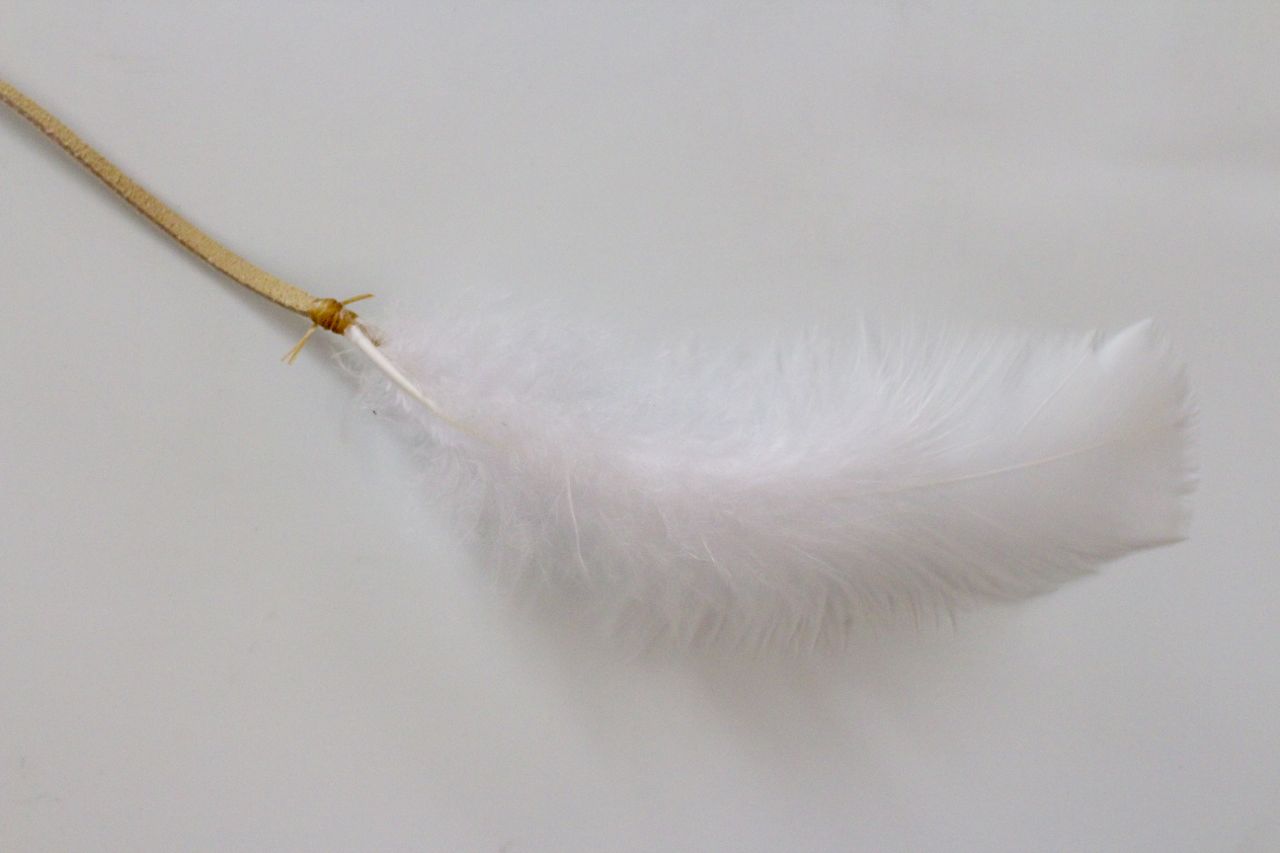
Step 6: Now you’re going to use the sinew to tie on the feathers. (As you can see, I didn’t worry about making it too finished-looking; I think a little homegrown vibe is nice here.)
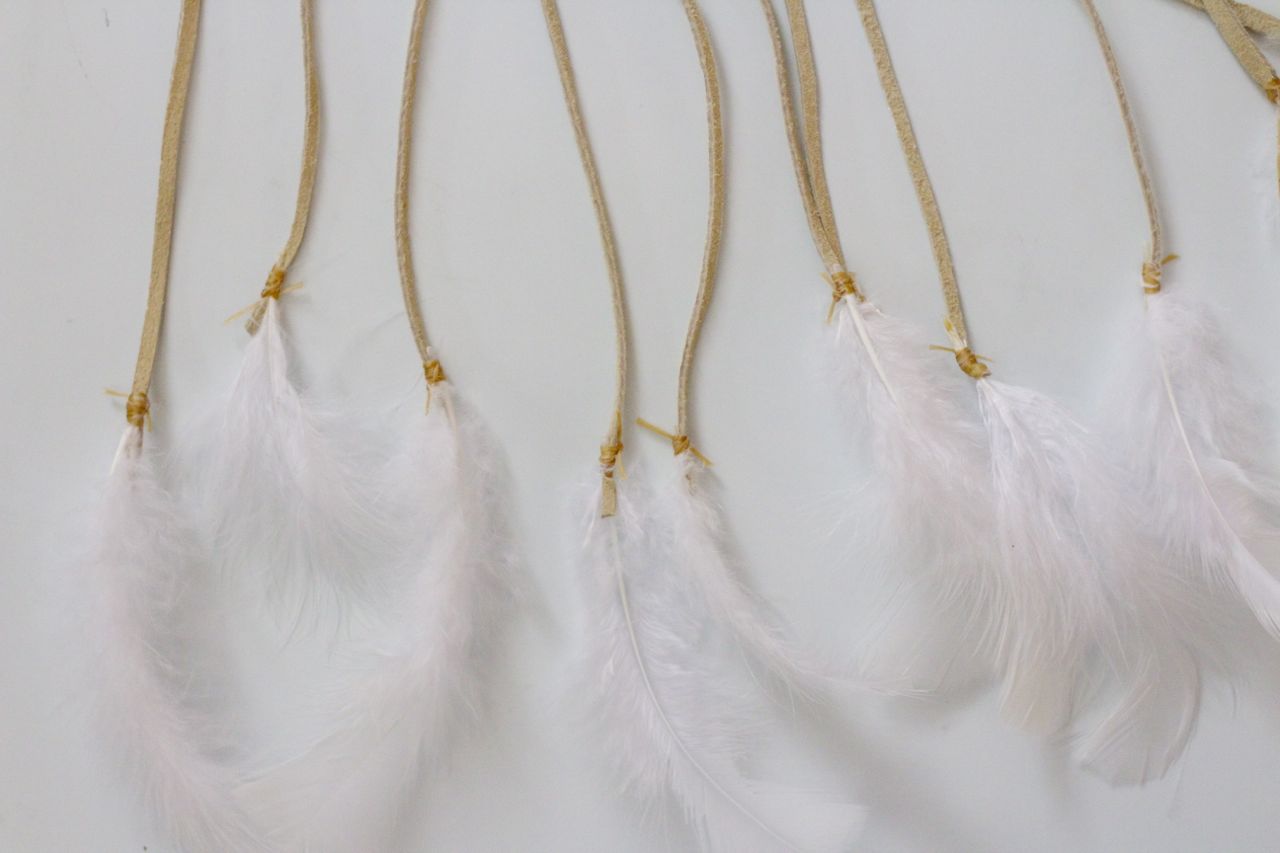
Repeat until there’s a feather on the end of each piece of lace. Pretty!
And done.
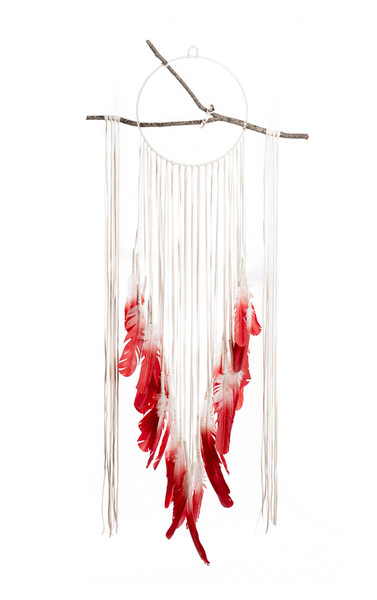
Here’s another one I made, with black suede lacing and red feathers (I also used black embroidery thread to wrap the stick):

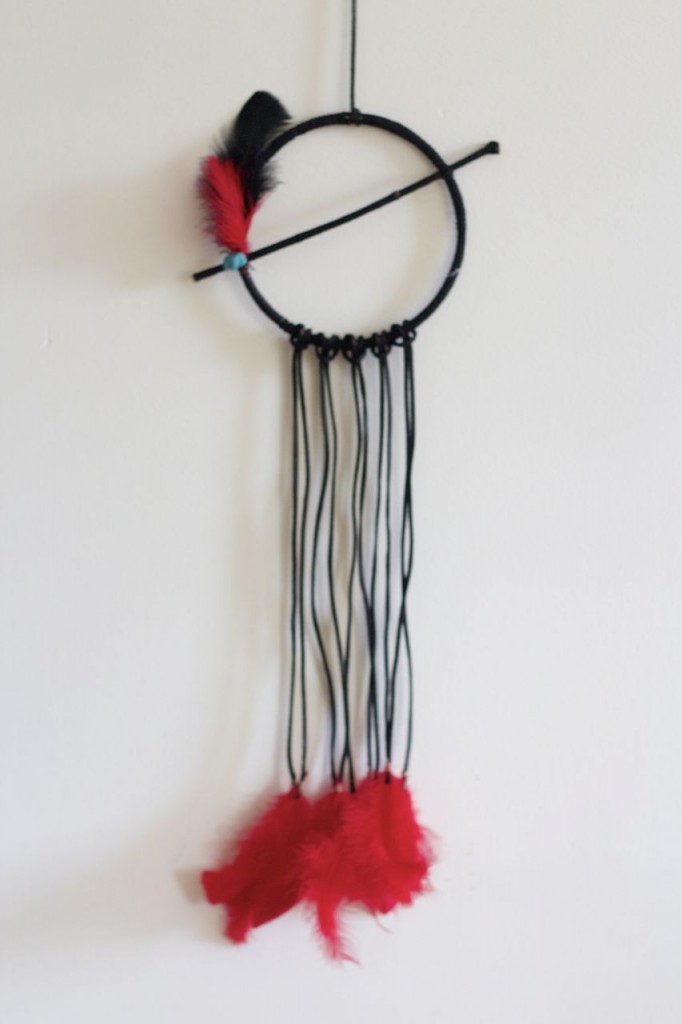
It’s kind of like punky-dreamcatcher. I like it.
This one went above my son’s bed – he calls it his “kitcher” – and the first one went above Goldie’s. Sweet dreams for everyone!


