Deep frying freaks. Me. Out.
First of all, I never had any idea how it worked. I pictured enormous bubbling vats filled with million-degree oil-bombs, and if there’s one thing I should stay very far away from it’s bubbling vats filled with million-degree oil-bombs. I just didn’t get it: you put your meat, fish or vegetable in…and then…what? Does it…float? Or do you have to brave the oil-bomb with a set of (heat-conductive) tongs? How do you know when things are hot enough, or when they’re cooked through?
How do you not set the kitchen on fire?!
Anyway, shocker: it’s easy. And not nearly as terrifying as I pictured.
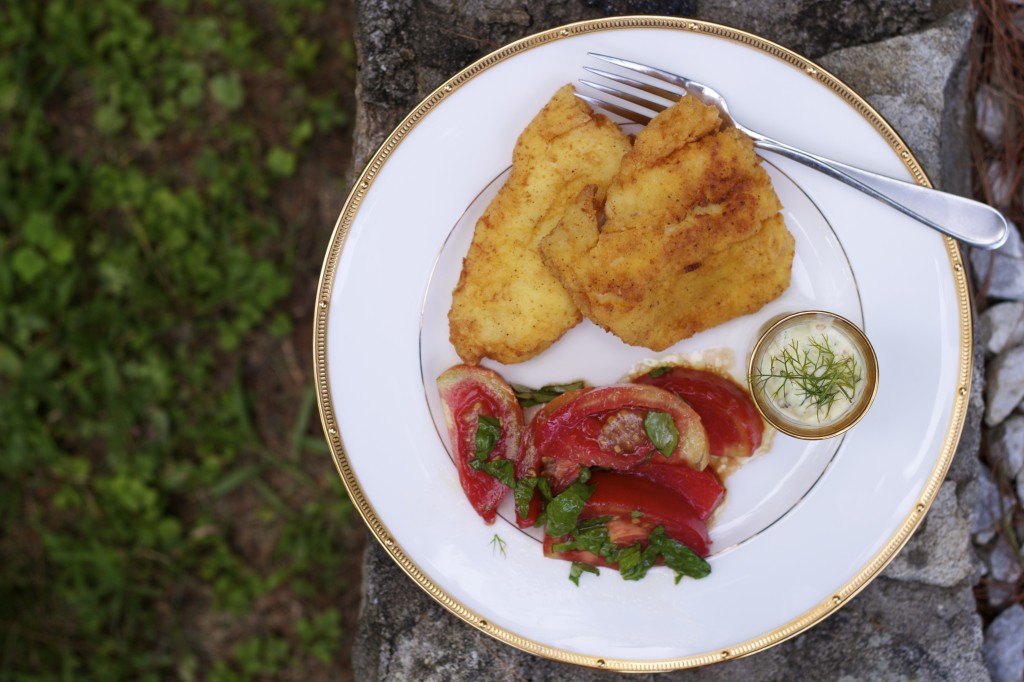
For my first venture into the Land Of Deep-Frying, I chose something simple: cod (the fish that’s usually used for fish and chips). I also cheated and used store-bought Zatarain’s Breading Mix (the kind the guy behind the fish counter recommended) rather than making my own blend because I figured that with my debut deep-fry I should leave as few elements to chance as possible.
What I Did:
1. Heated about 3/4″ olive oil (UPDATE: thank you to those of you who let me know not to use olive oil when deep-frying; you are absolutely correct, and according to this article canola is a much better pick) in a cast-iron pan (my Le Creuset) until a piece of fish sizzled immediately when dipped in (I cut off a small piece of fish for just this purpose).
2. Cut cod into manageably sized pieces (about 3″ square).
3. Dipped each piece of cod in a mix of 1/2 cup milk and one lightly beaten egg, then in the breading mix.
4. Gently lowered the fish into the oil and let it cook for about 3-4 minutes on each side before removing to a paper towel-covered plate to drain. Since this is the kind of meal best served hot, I made sure that everything else was prepared in advance, and cooked all the fish at once (I sort of jigsawed the pieces into my pot and it turned out fine).
(Served alongside tartar sauce and a heirloom tomato-and-basil salad; the tomato I didn’t grow, but the basil I did.)


If you’re entertaining (or just want dinner to look extra-special), here’s a time-saving tip: rather than making things like dips from scratch, buy them from the store and then spruce them up with garnishes (like the fresh dill I snipped from my vegetable garden) to add flavor and pizazz.


