Remember my Homemade Samoas experiment from a couple of weeks ago? They were sort of an awesomely big hit with the friends and family, so I figured I’d give another Girl Scout Cookie the homemade treatment this weekend.
Presenting: Homemade Thin Mints.
(Recipe via Baking Bites; below you’ll find both the original recipe and my recommended modifications.)
What you need:
For cookies:
2 1/4 cups all purpose flour
1/4 cup cornstarch
6 tbsp unsweetened cocoa powder
1/2 tsp salt
1 cup white sugar
1/2 cup butter, room temperature
1/3 cup milk (**Recommended: about 1/2 cup**)
1/2 tsp vanilla extract
3/4 tsp peppermint extract (**Recommended: 1 tsp**)
For icing:
10-oz dark or semisweet chocolate
1/2 cup butter, room temperature (**I would eliminate the butter; it’s not necessary and makes the chocolate more likely to burn.**)
What you do:

1. In a medium bowl, whisk together flour, cornstarch, cocoa powder, and salt.

2. In a large bowl, beat butter and sugar. Beat in milk and extracts (I recommend adding a little more peppermint extract – my finished cookies weren’t quiiiiite minty enough). The mixture will look a bit curdled, but that’s OK.

3. Gradually add in the flour mixture until fully incorporated. The dough is very dry, so getting it all mixed together takes a bit of muscle. Like I said above, I’d recommend using a touch more milk to get everything to hold together a bit better; I had trouble shaping the dough into logs (next step) because it was so dry.

4. Shape the dough into two logs, each about 1 1/2″ in diameter. Wrap in Saran Wrap and freeze for at least 1-2 hours. If you have trouble forming the logs, try pouring the dough into the Saran Wrap, kneading it a bit to make it hold together, and then using the plastic to shape them.

5. Remove dough from freezer and cut into 1/4″ rounds. Mine were uneven; they turned out just fine anyway.

6. Place rounds on a parchment-lined baking sheet and bake in a 375F oven for 13-15 minutes, or until crisp. You can place them quite close together, because they won’t expand much.
7. Let the cookies cool for a bit, and then move on to the frosting: I know that the instructions say to melt together chocolate and butter, but this is unnecessary: just microwave some dark or semisweet chocolate chips in the microwave, stirring at 30-second increments until smooth, and then dip the cookies, using a fork to flip them over. Set on wax paper and put in the refrigerator to solidify.

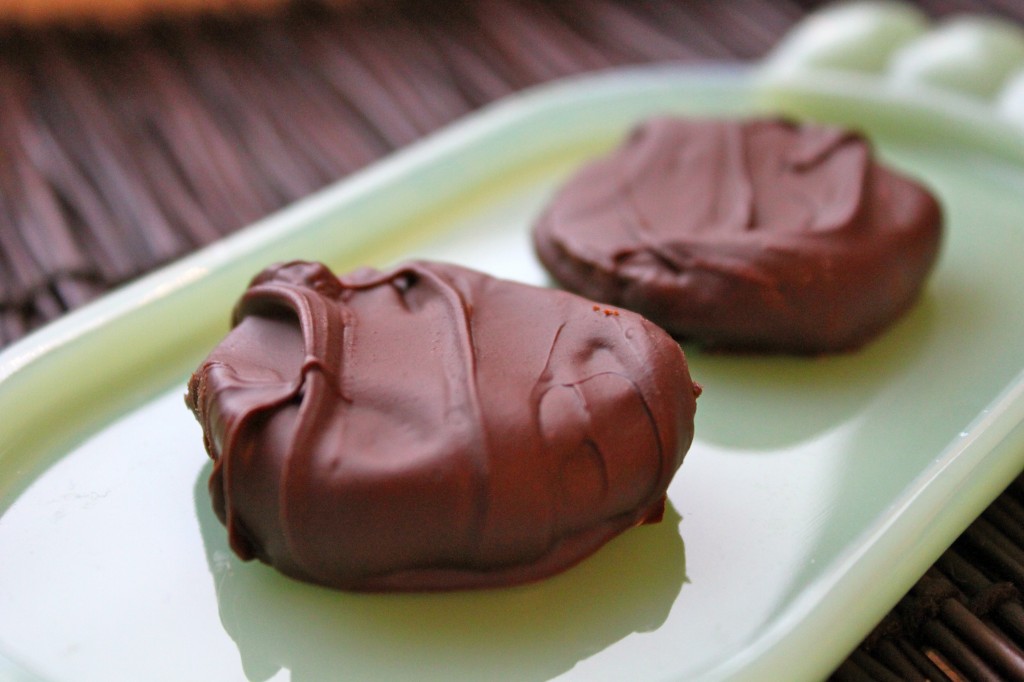
…And this is what you get! I love the chocolate ripples across the top; so much more elegant than traditional Thin Mints, and a perfect dipping cookie to serve alongside a cup of coffee.

Now, a comparison: the homemade version obviously looks about a zillion times more delicious than The Original…but the taste is pretty different. I think you’d get closer to the traditional Thin Mint taste if you a) made the modifications I suggested above (such as more peppermint extract), b) went for dark chocolate chips instead of semisweet, and c) made the chocolate coating a bit thinner. These are excellent in their own right, though, and are just as good as regular Thin Mints when frozen and crumbled over mint chocolate chip ice cream. Trust me on that one.


